Viewing entries tagged
cycling

It’s Just a Ride in The Park: Why You Should Try Cyclocross in Words and Photos

It’s Just a Ride in The Park: Why You Should Try Cyclocross in Words and Photos

It has been three days since Jalapeno Cycling released our announcement for two development teams (a men’s and women’s) geared for riders who have never raced cyclocross before, and we’ve already got a great group of people from New Jersey and New York City (and even well beyond) who have filled out the application. I’ve spent the last few days chatting with local folks from running groups, roll-out bike clubs, women’s cycling groups, and a triathlon club to drum up interest. In a lot of cases, I get both excitement as well as a quick follow up of “OH DAMN, I couldn’t do something like that.”

To me this is a strange reaction, but I’ve been racing cyclocross for a good while now. During the offseason, I proudly compete in 10K runs and triathlons. Both cyclocross and these running events are some of the safer forms of competitions. Certainly you might find someone getting medical attention in both places, but due to the low speed of these competitions, injury through falling is just not common place. And yet, cyclocross is seen as an X Games worthy endeavor while some people see a January Resolution Run as a harmless way to sweat out their New Year's hangover.

I have griped enough on how cyclocross promoters, racers, and spectators have a tendency to push and promote the crashing that happens on courses or sections that amateurs are not even allowed to race on. Instead, today I want to focus on what I think runners and triathletes are usually doing right, and how cyclocross can fit into this picture.

Before, during, and after, the focus in triathlons and running events is personal achievement. Whether you get in the top 10%, beat your old time, land on the podium, or just want to finish the race, the focus is on preparation, training, willpower, and accomplishment. (Even a quick search of crash reels in running usually showcase someone falling, getting back up, and finishing the race in first against all odds). As far as disciplines that play out in a similar way, the only thing that even comes close to cyclocross in this regard is perhaps gravel racing.

So if you are looking to give yourself a challenge, why bother with cyclocross when you already are engaged in a safe athletic competition? Here's why...

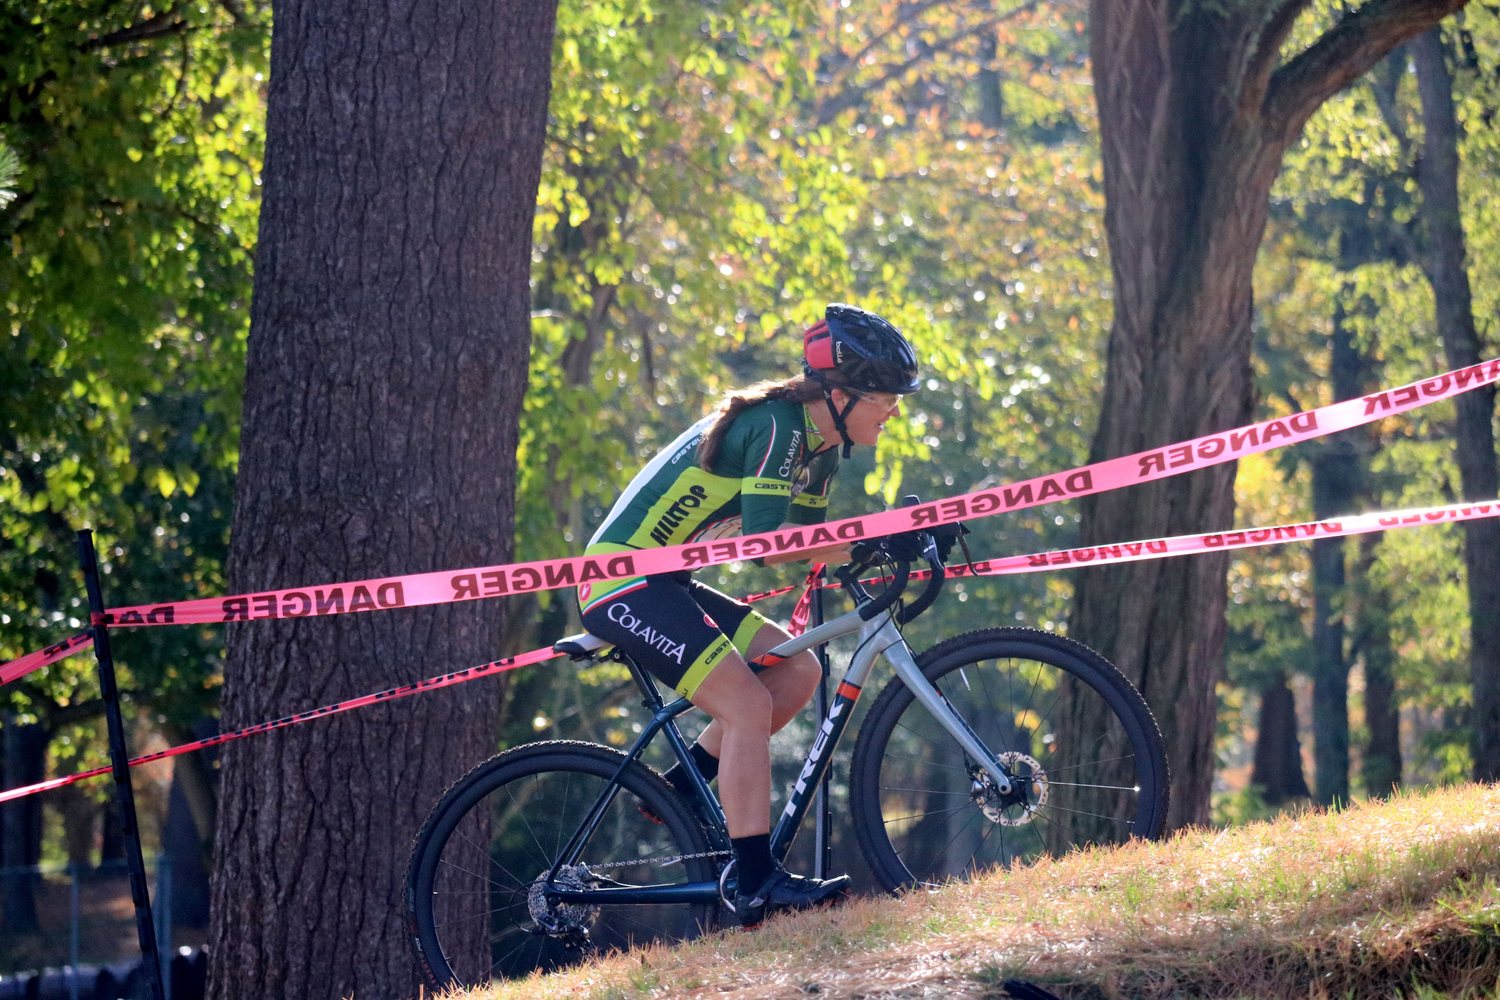
1) Every cyclocross course and venue is drastically different. Some courses are in an open field without a hint of shade in sight. Others are winding through nothing but trees. Some have steep climbs you have to run up, and others have thick grass you have to try and push through. Every course gives you a different mental challenge. You can’t just expect to show up and systematically count your splits. The more you try and shut your brain off and muscle your way through something, usually the harder you are making the race for yourself.

And because cyclocross is becoming global, the more you seek out adventure, the more you’re rewarded. From the dry earth of Colorado races, to the bogs of the Northwest, to the city parks of the lower Mid-Atlantic, to the epic coastal scenery of New England, the challenges only get better, and I’ve only touched on one country.

2) Cyclocross is a game of do-overs. Preparing months for an event only to come down with the flu the day before a race is heart breaking, or perhaps you had a mechanical that you had to get off your bike and fix, or a shoe lace that broke. These problems are not so drastic in cyclocross. Usually there is two races at the same venue every weekend, so a bad Saturday can be followed by a personal best on Sunday. If you’re lucky enough to live in the NYC area, you can practically find several different cyclocross races every weekend from September to November and still race into December.

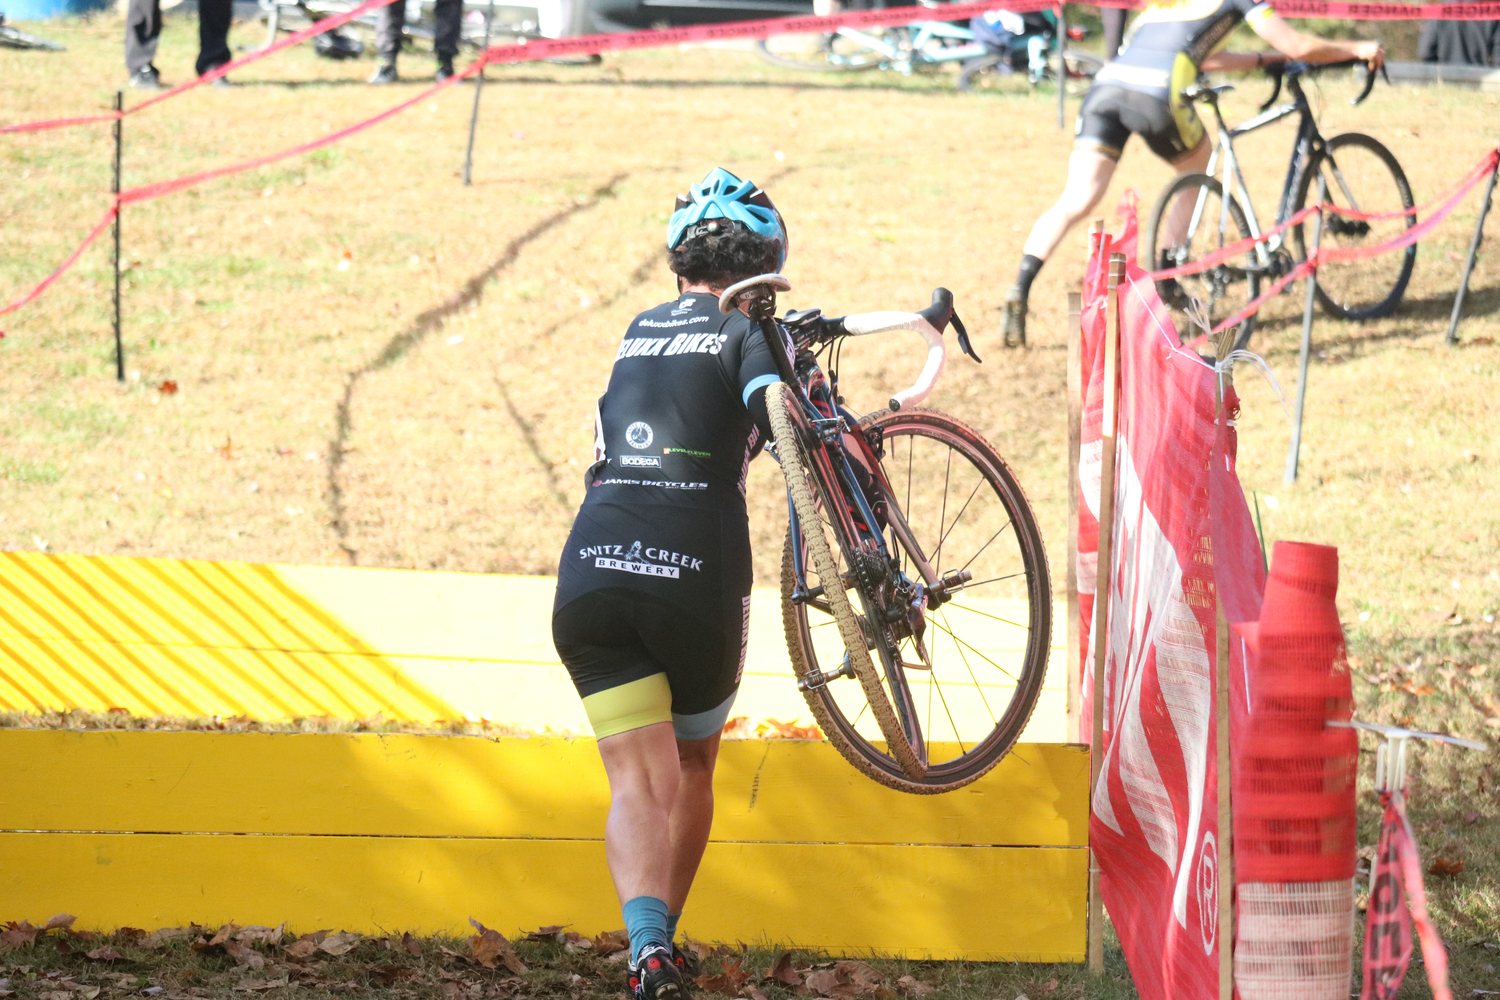
This do-over idea can even be applied to a more micro level! The length of every course is different, but you’ll likely be racing between three to six laps when you start racing for the first time. If a corner, or a run up, or some other feature trips you up on one lap, it can be your next challenge for perfection on the following lap. If you want it, cyclocross can be a game of chasing perfection.

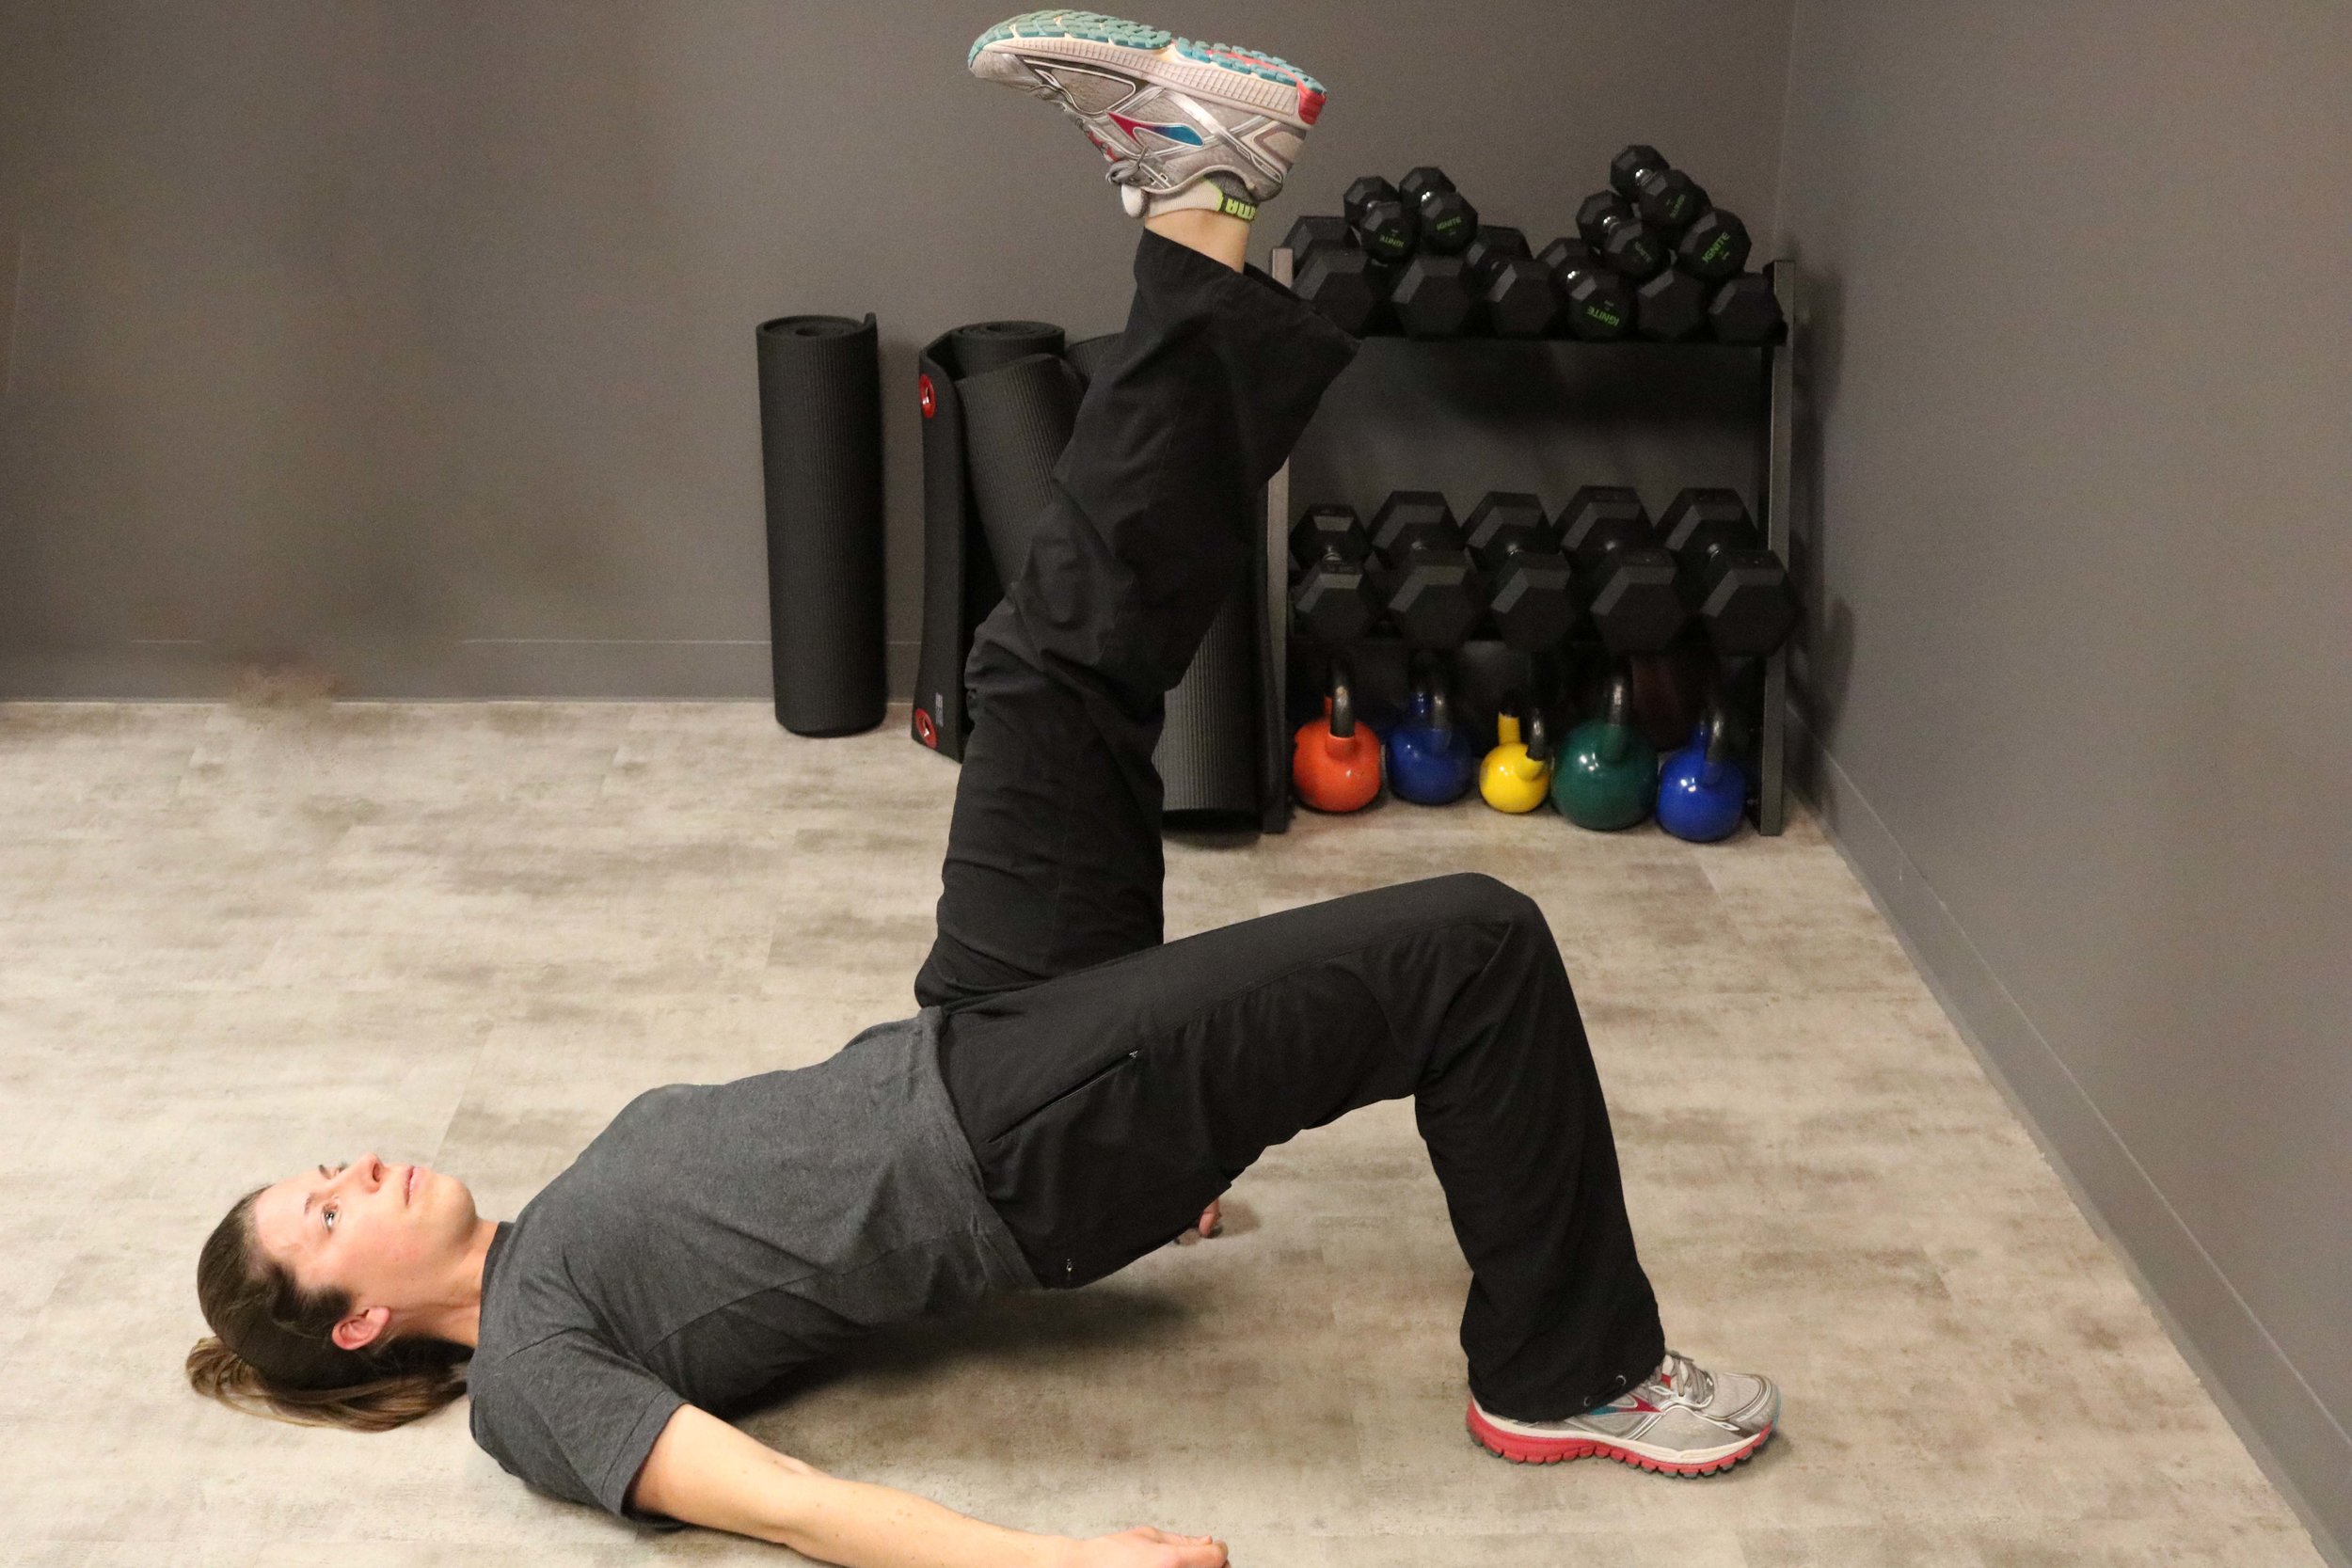
3) Breaks up your winter perfectly. Enough said. Cyclocross is the reason I look forward to the waning daylight instead of dread base mile time in the basement.

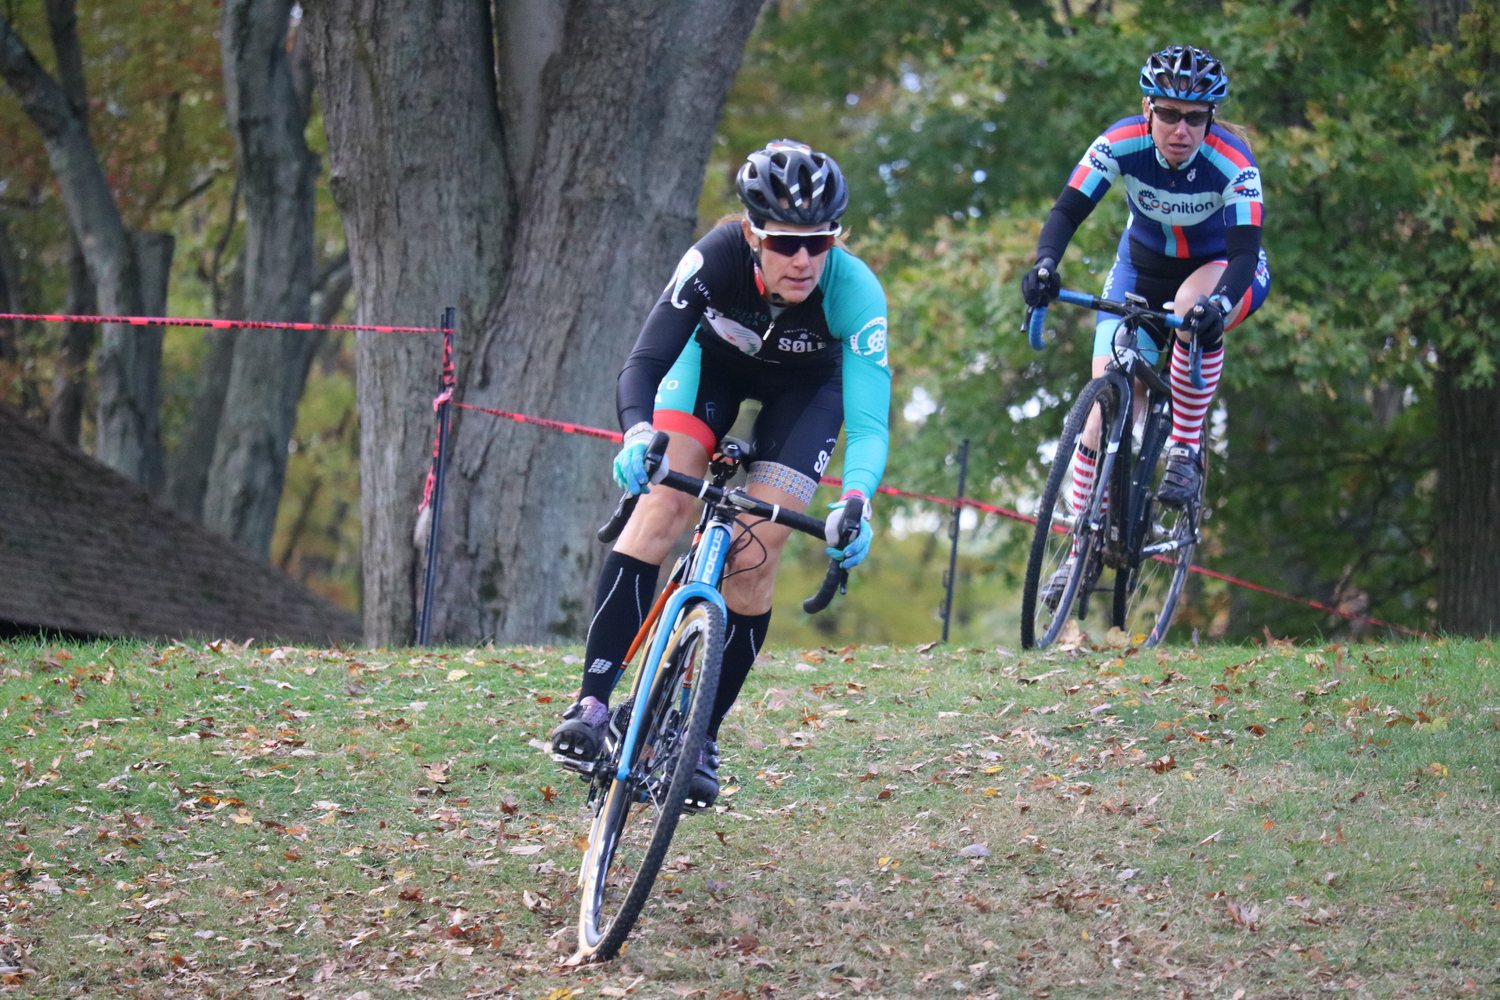
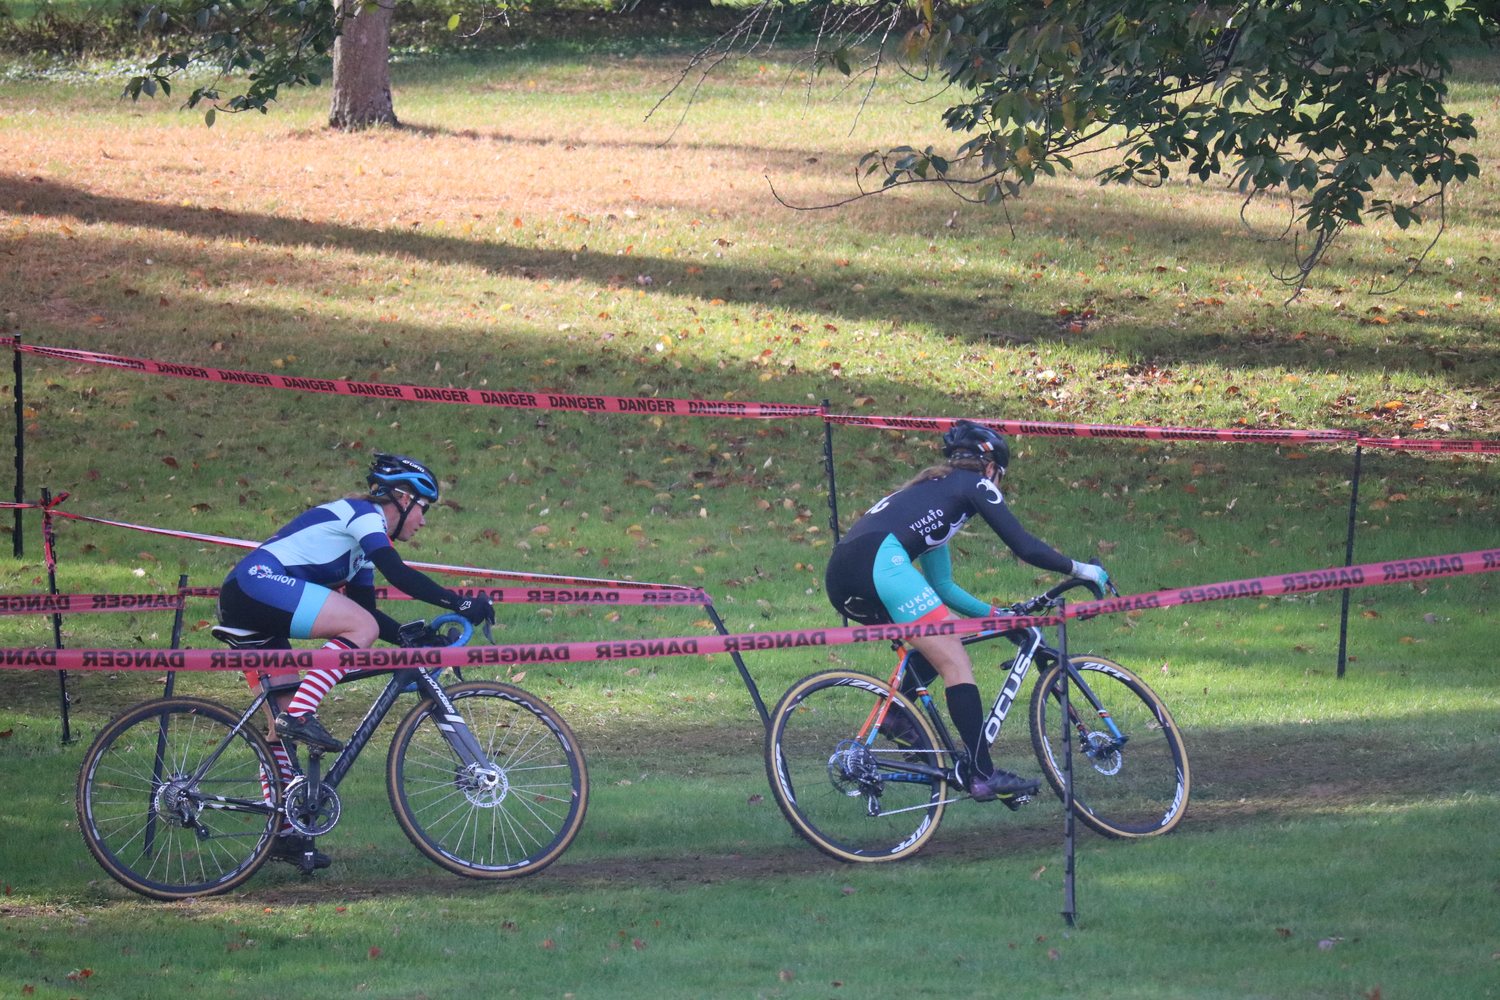
4) You are always fighting for something. No matter whether you’re avoiding being lapped at the back of the race, or you’re vying for a top ten, there is always something to fight for during the 30-40 minutes you are out there. With the advent of crossresults.com, you can even track the other riders who are very close in ability to you in order to paint a friendly target on a rival’s back for the next event.

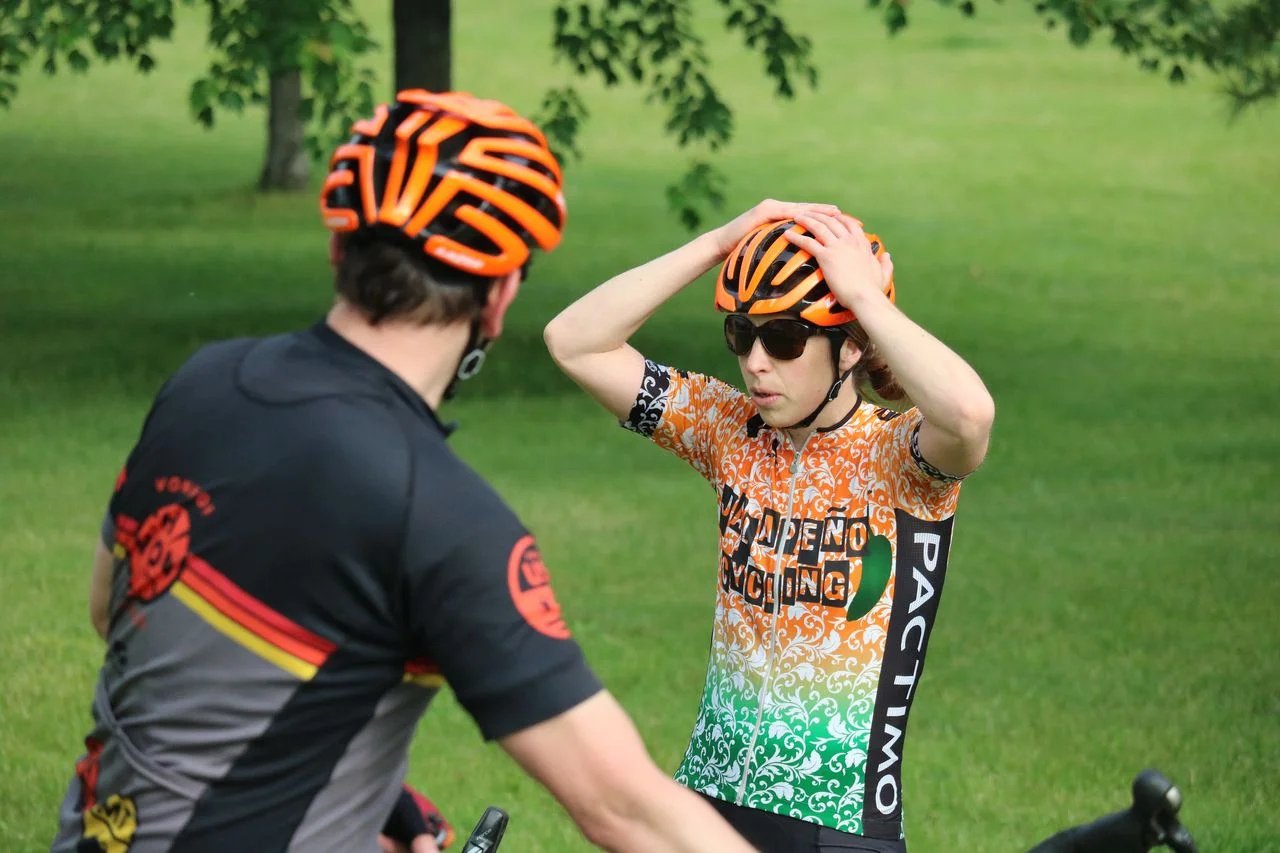
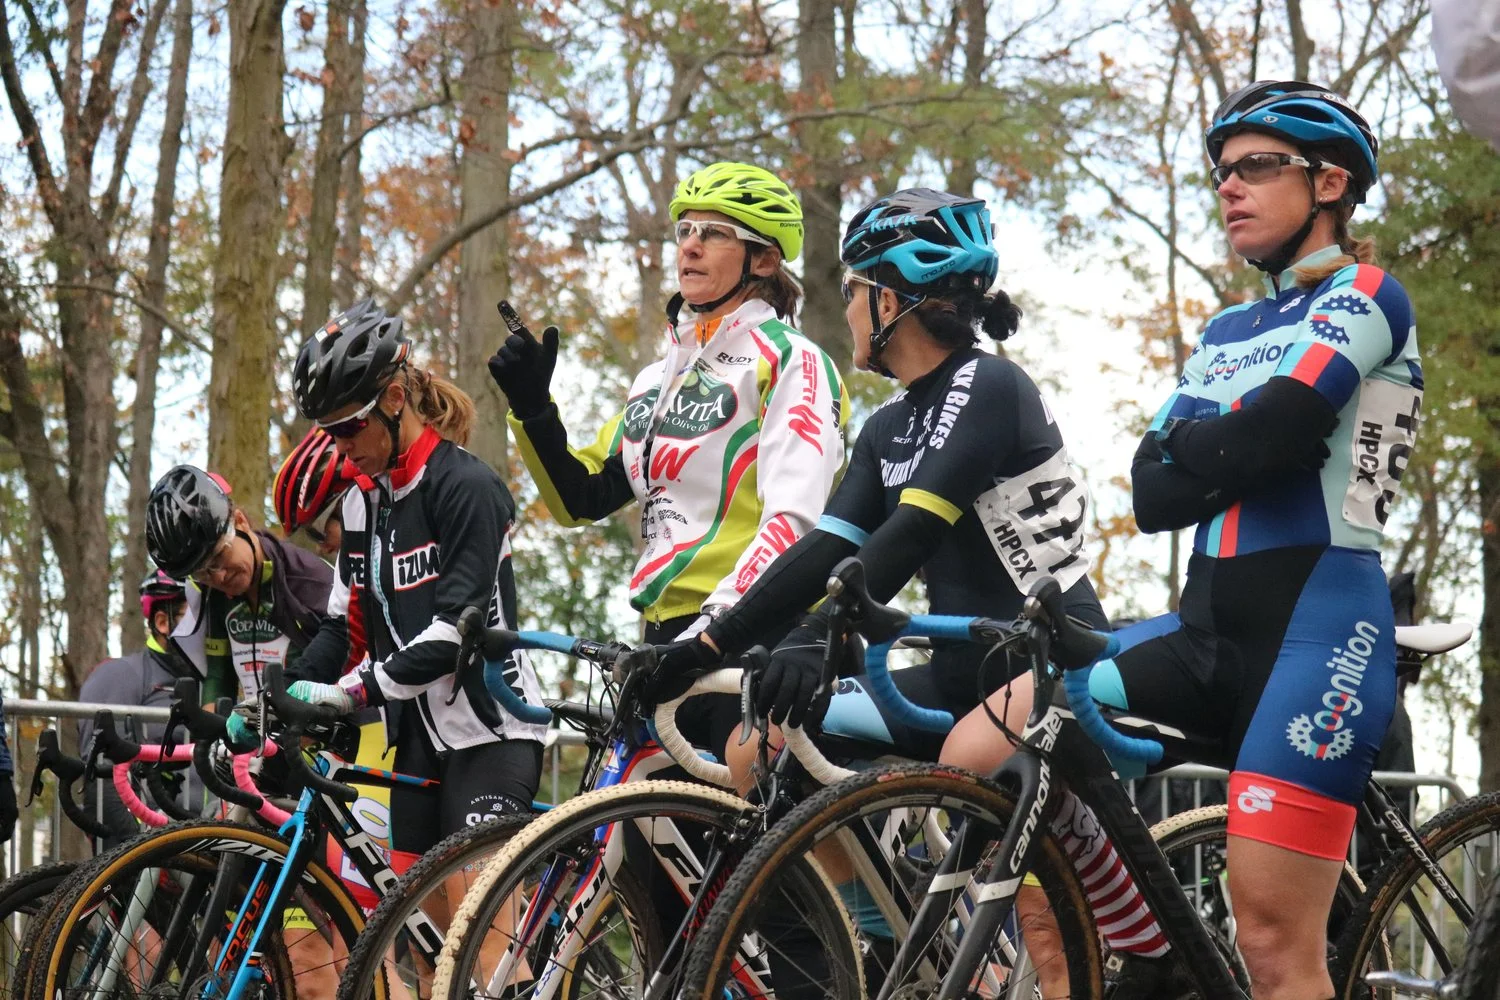
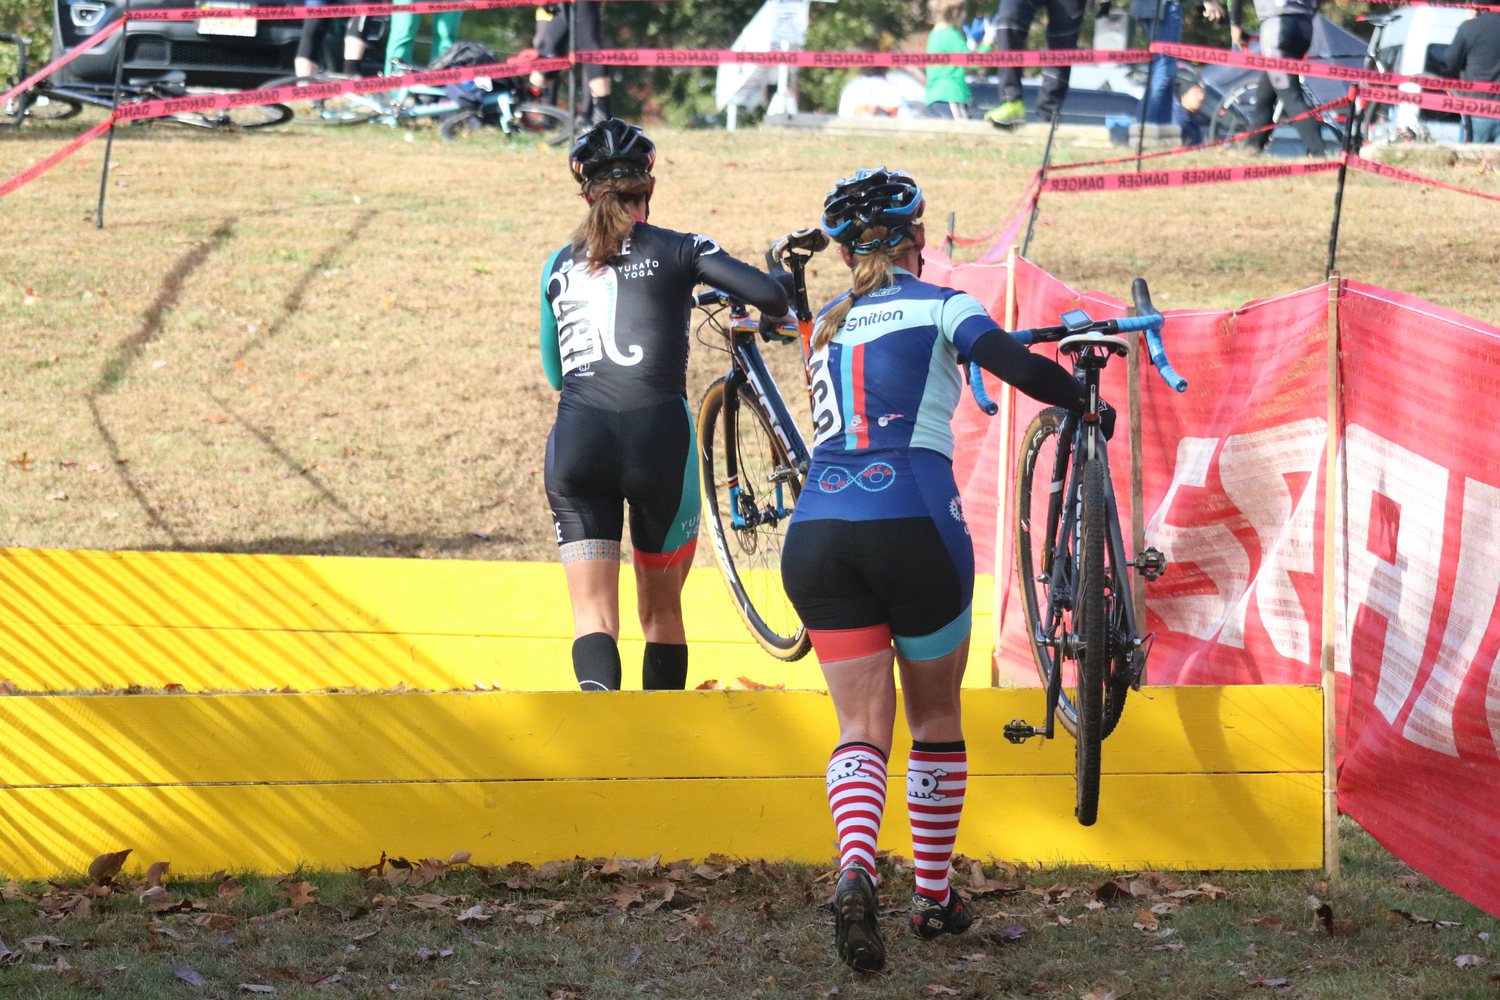
5) Cyclocross is a social sport. Racing is only part of the fun. After you are done, it’s time to pull up a chair and see how the more experienced racers take turns and features. Cheering and friendly heckling is all par for the course in one of the most fun disciplines to see play out.

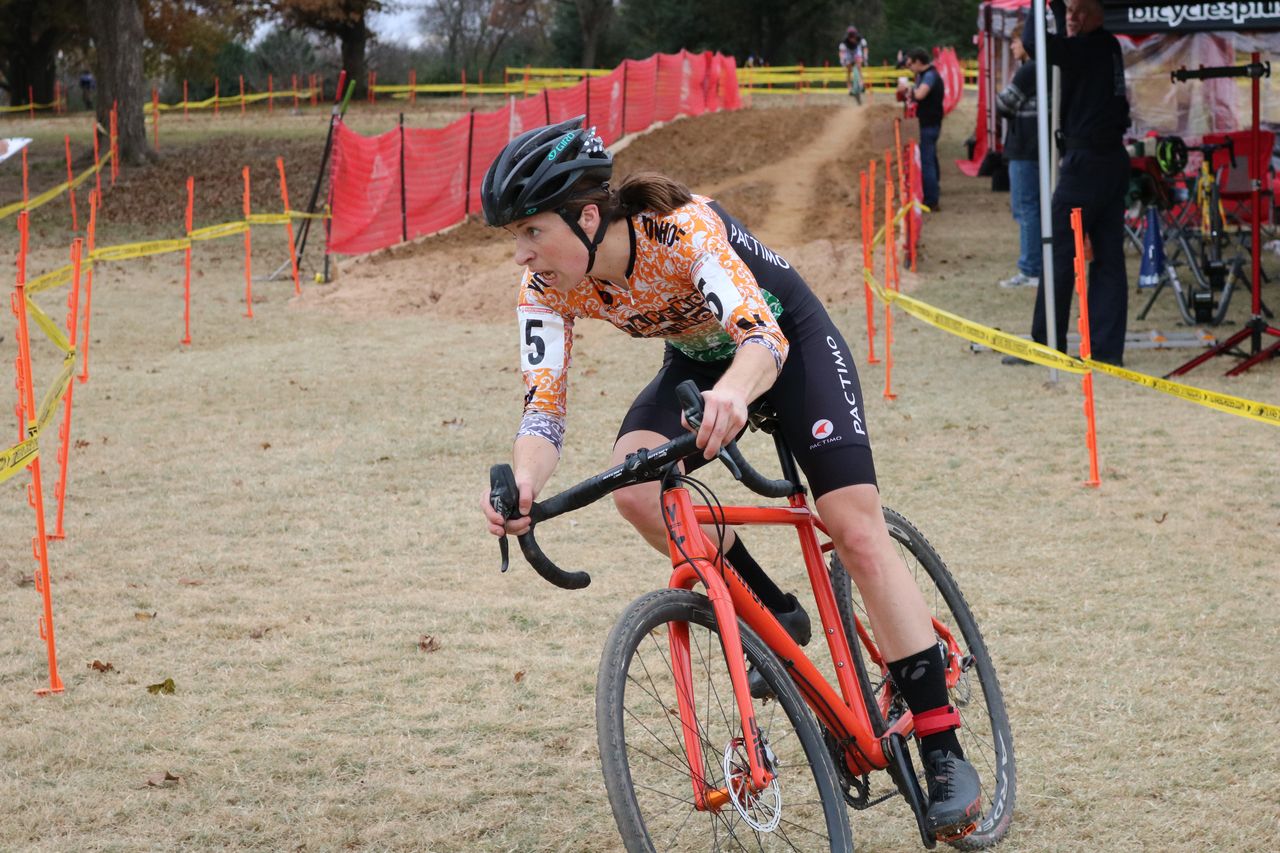
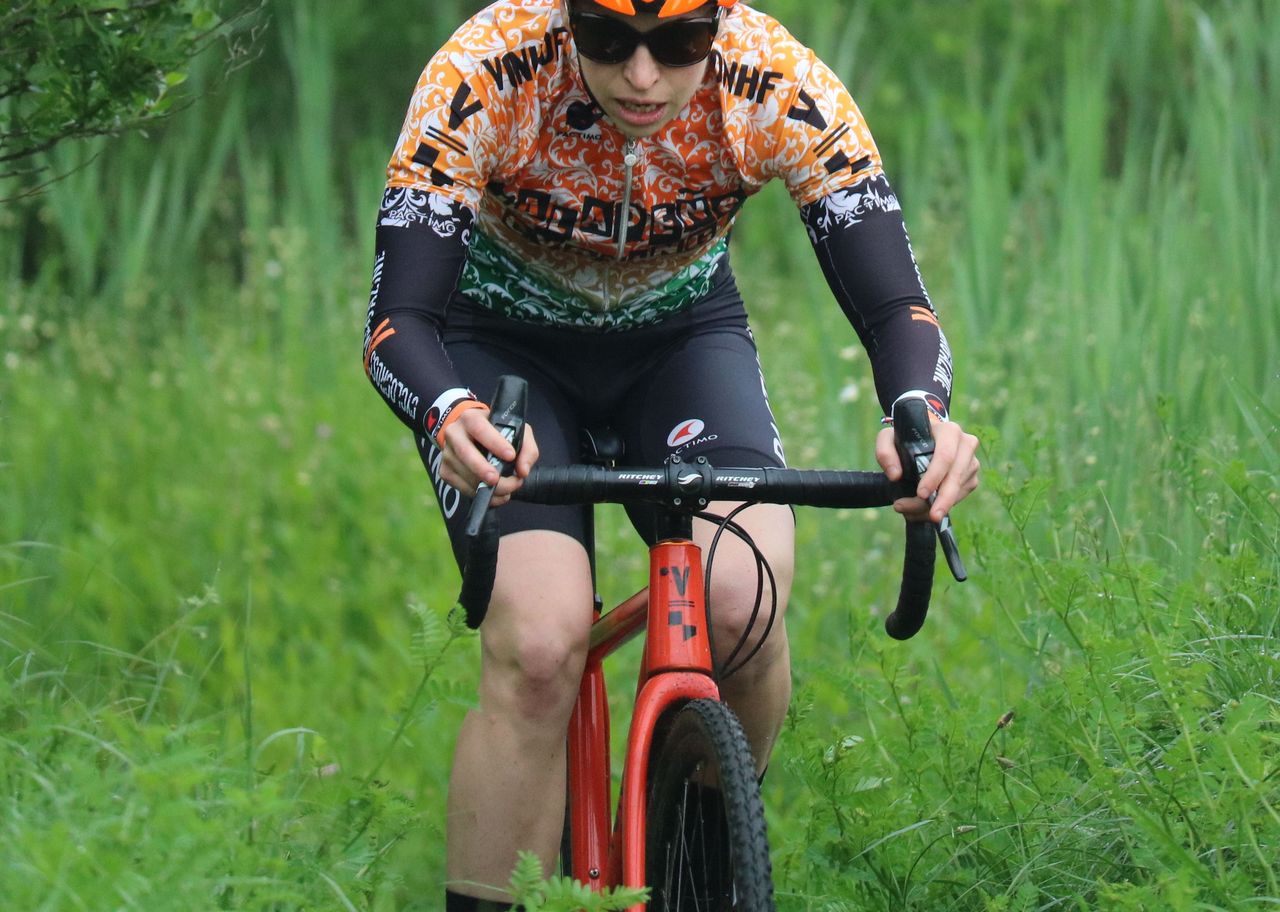
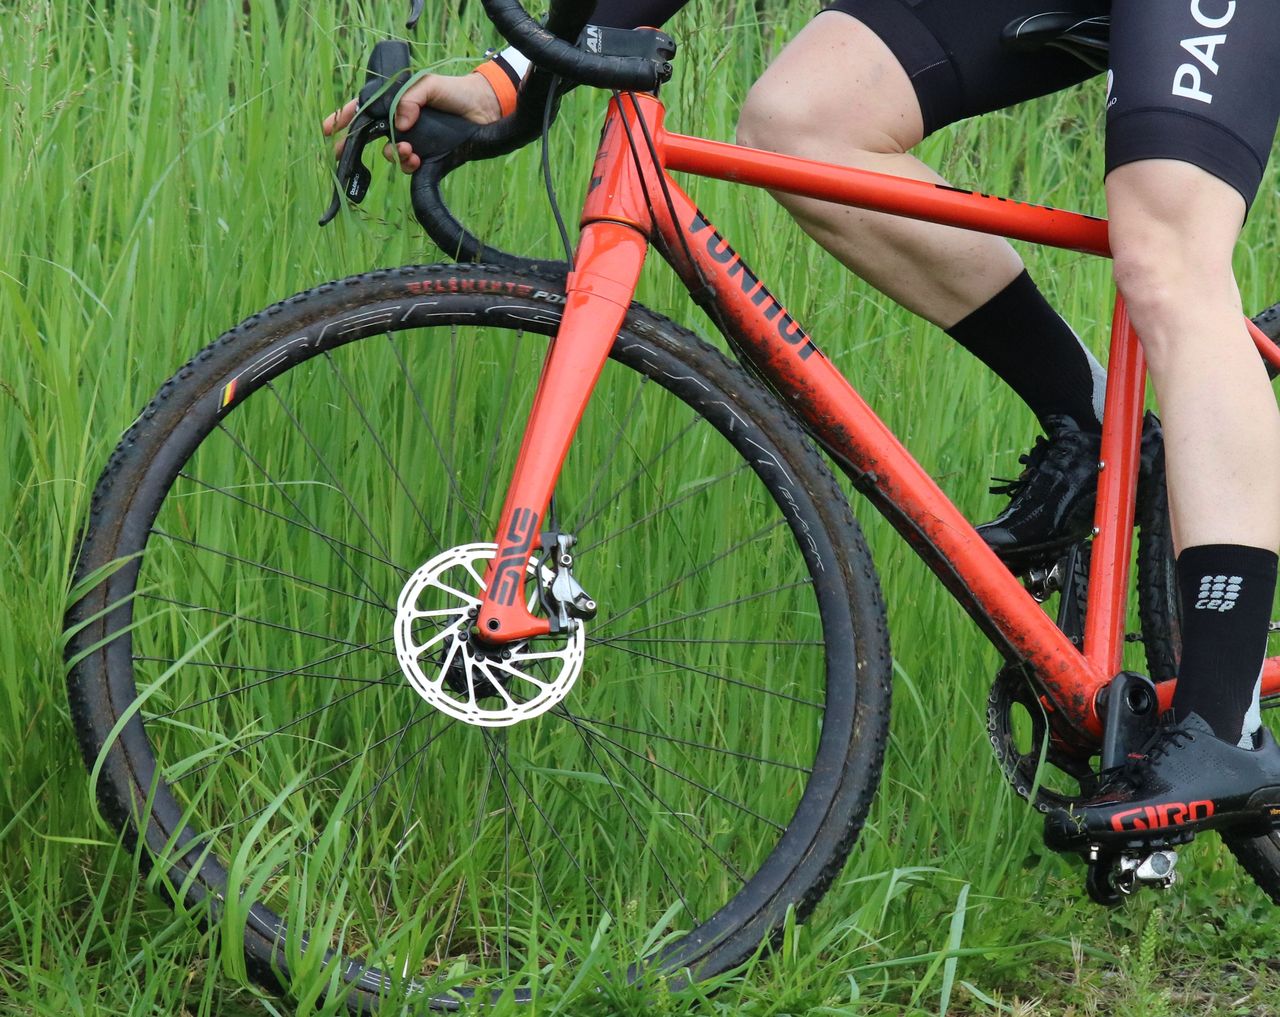
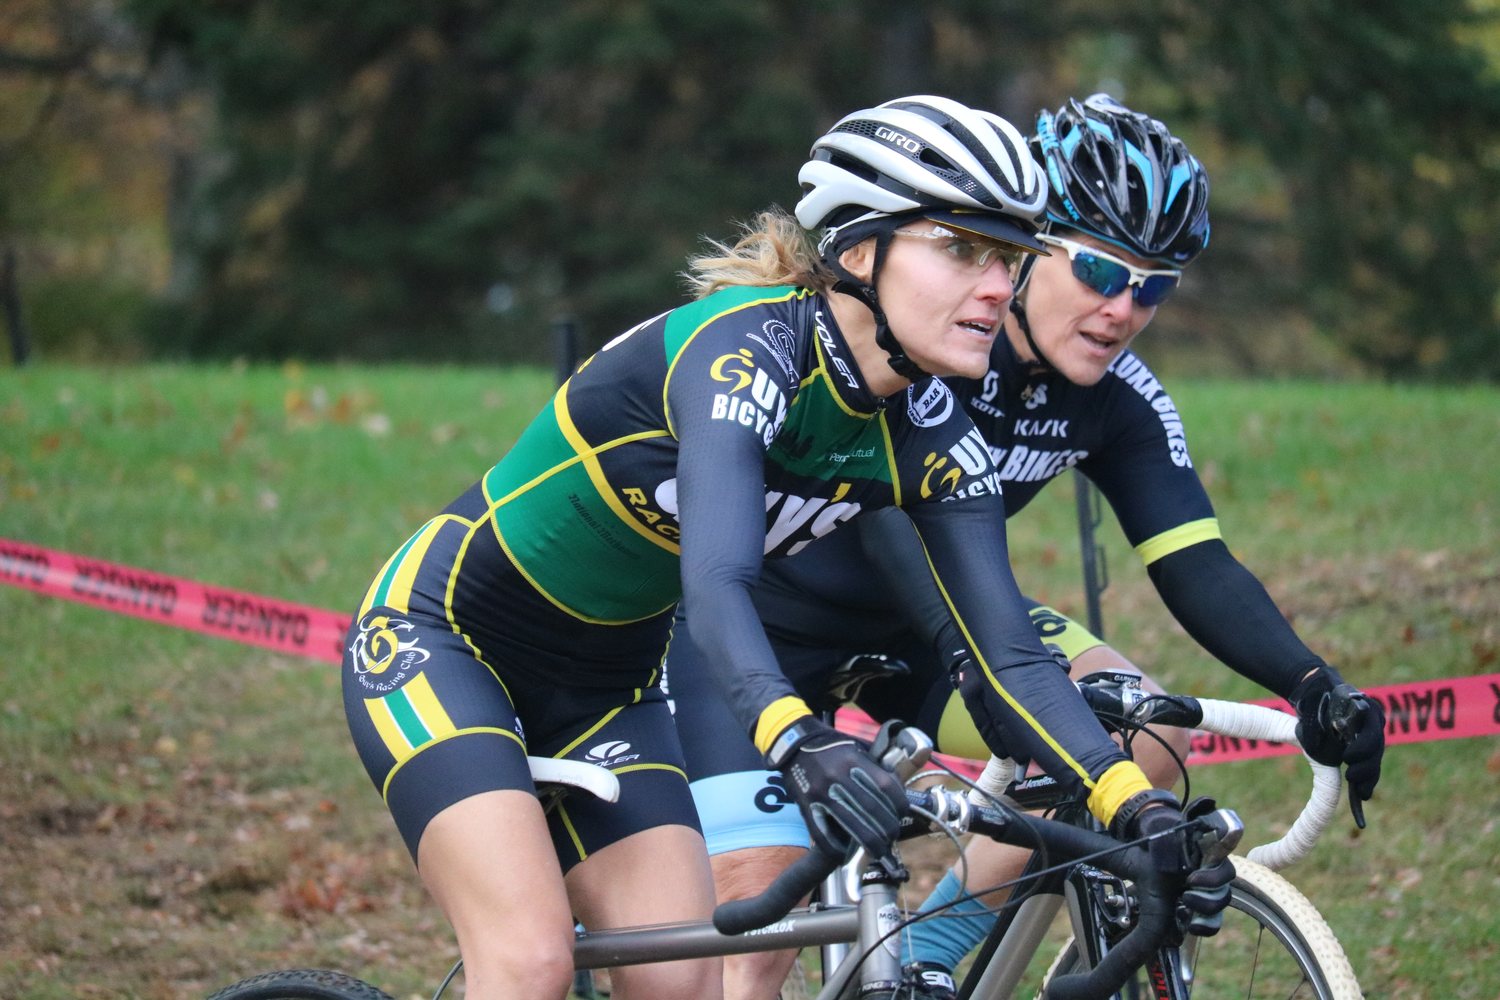
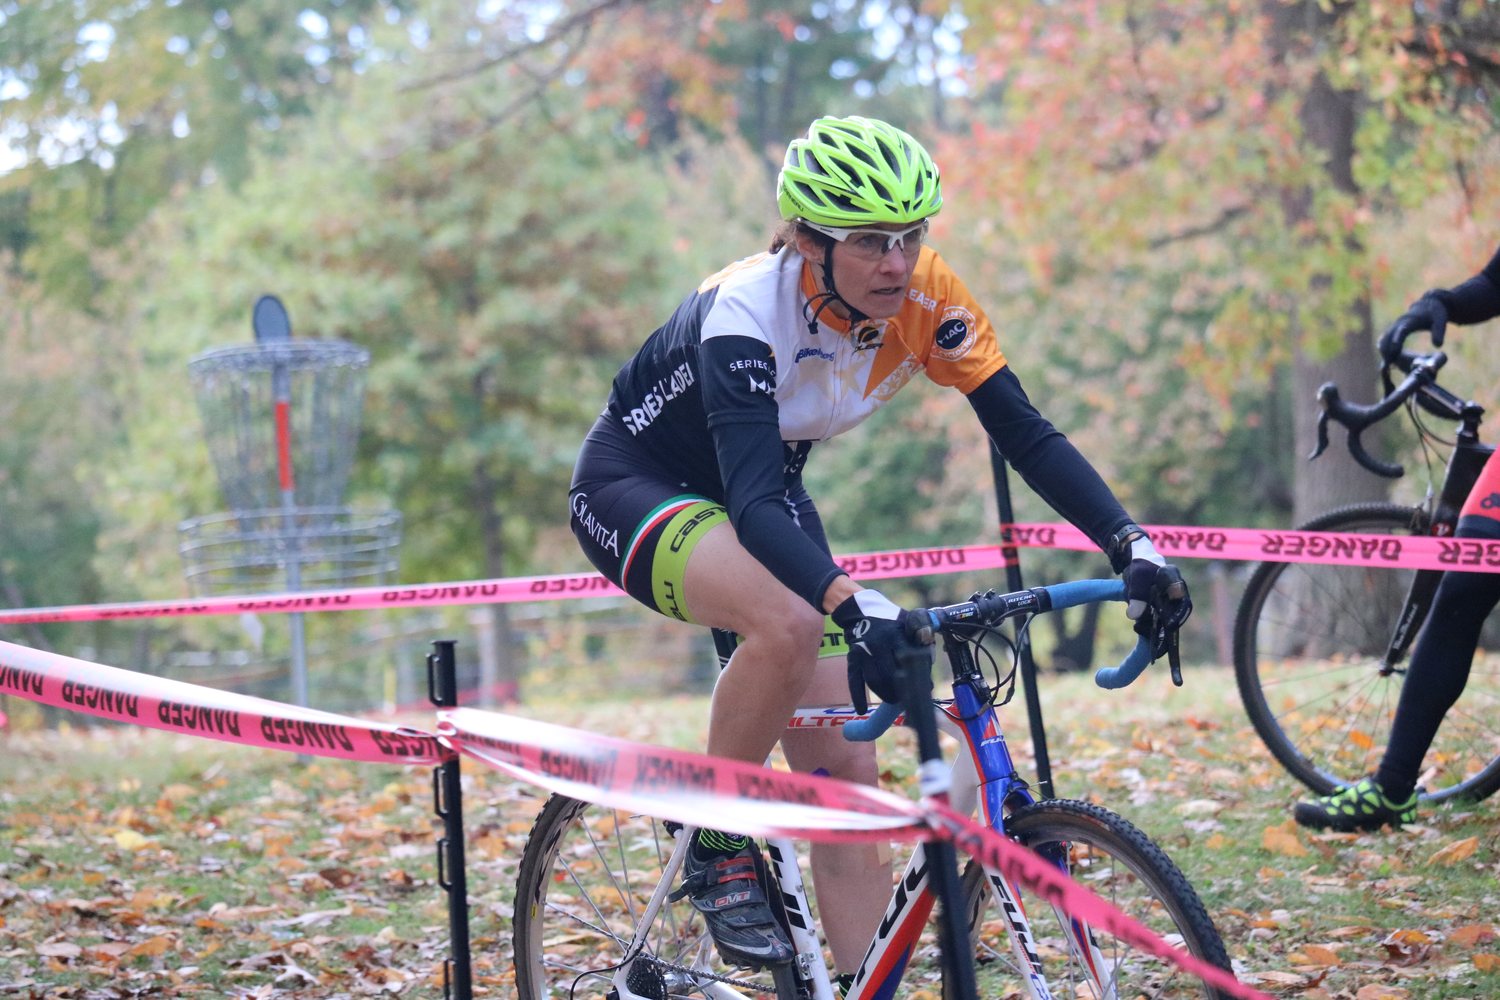
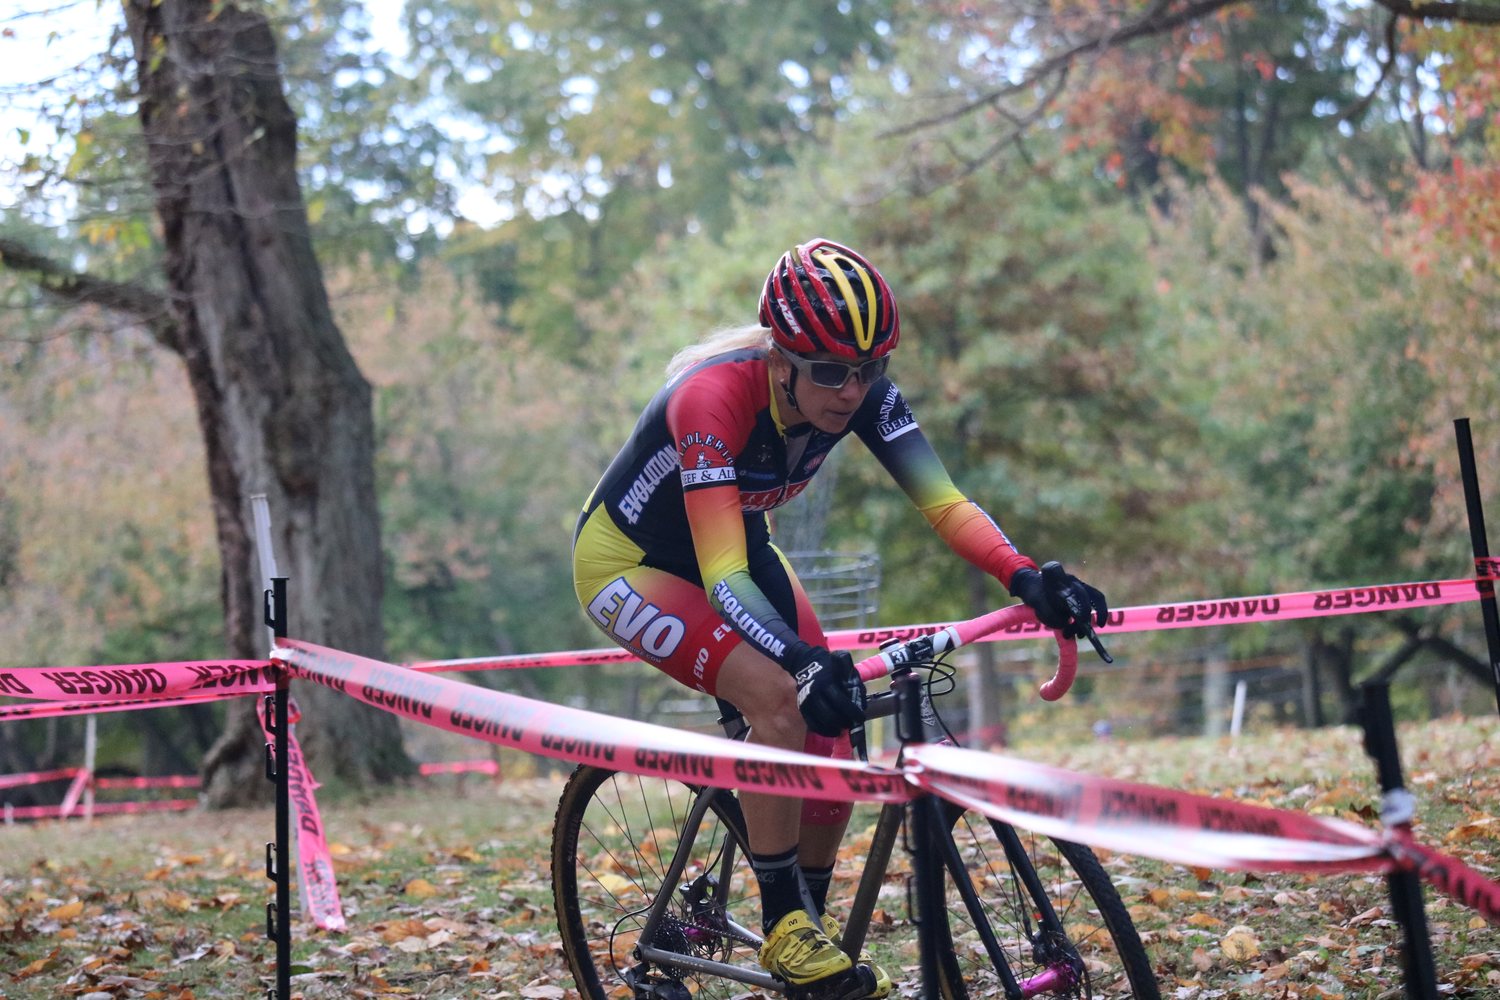
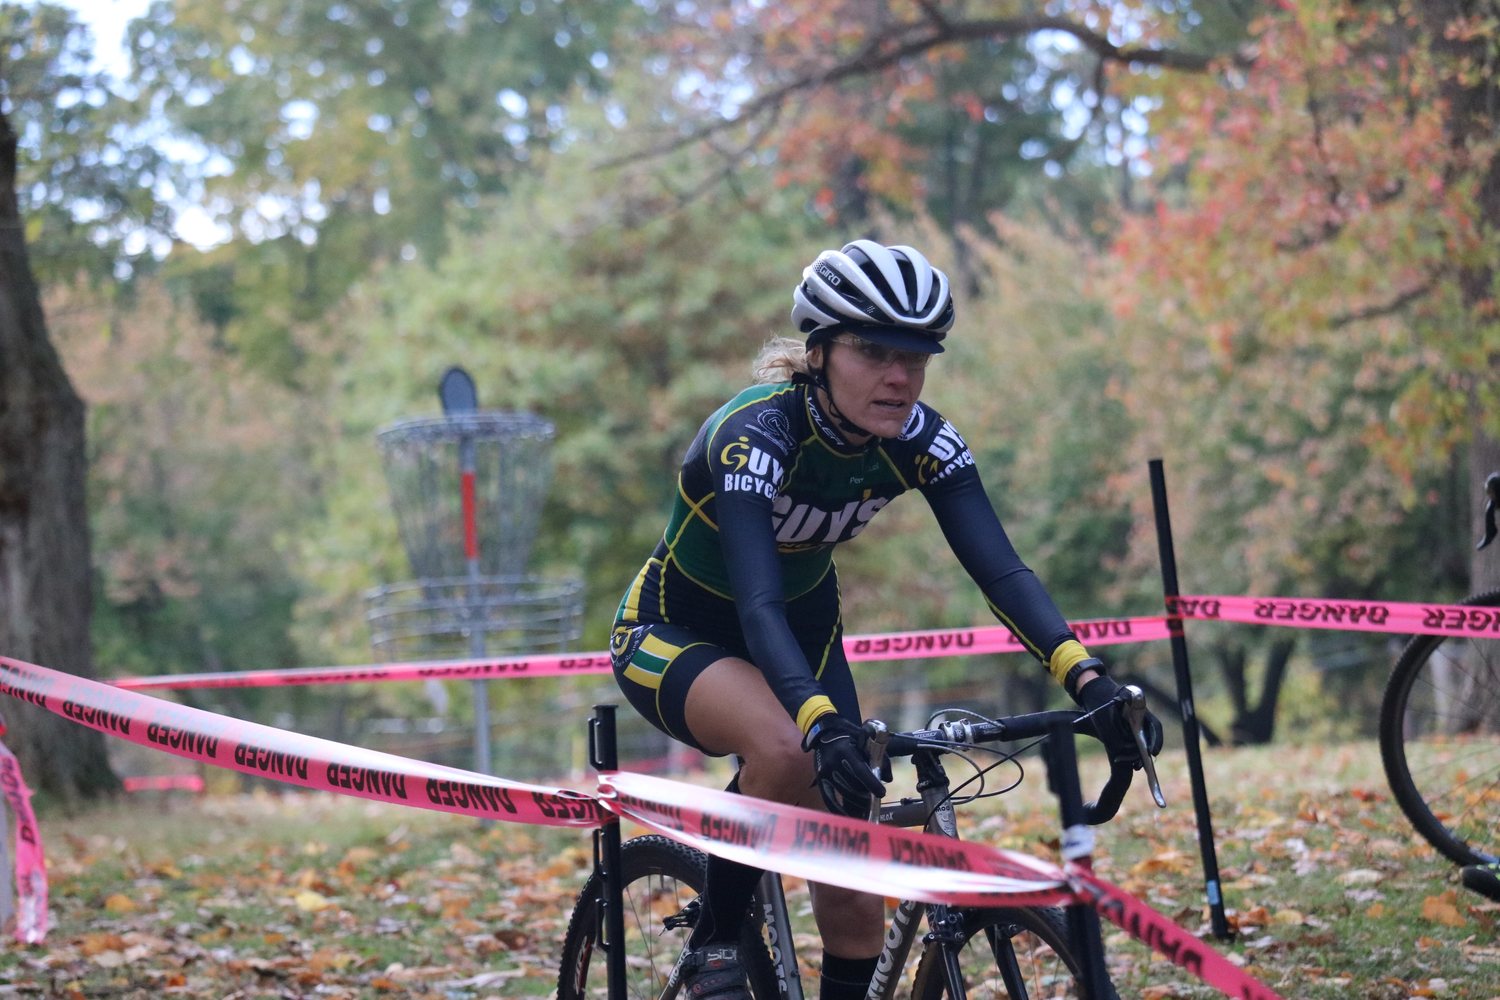
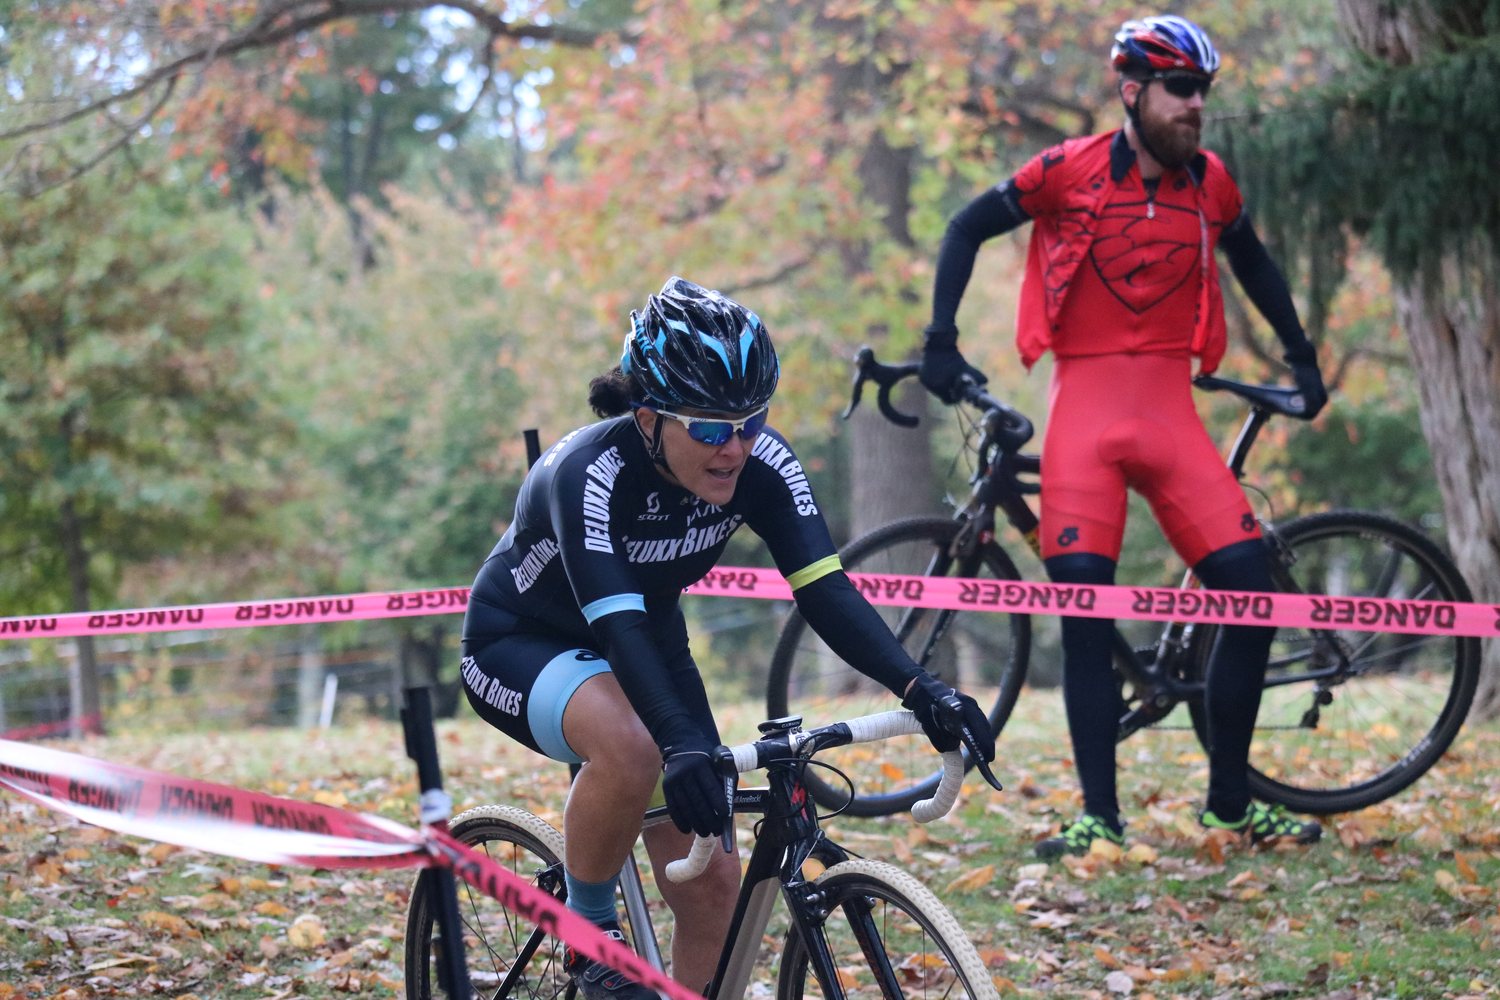
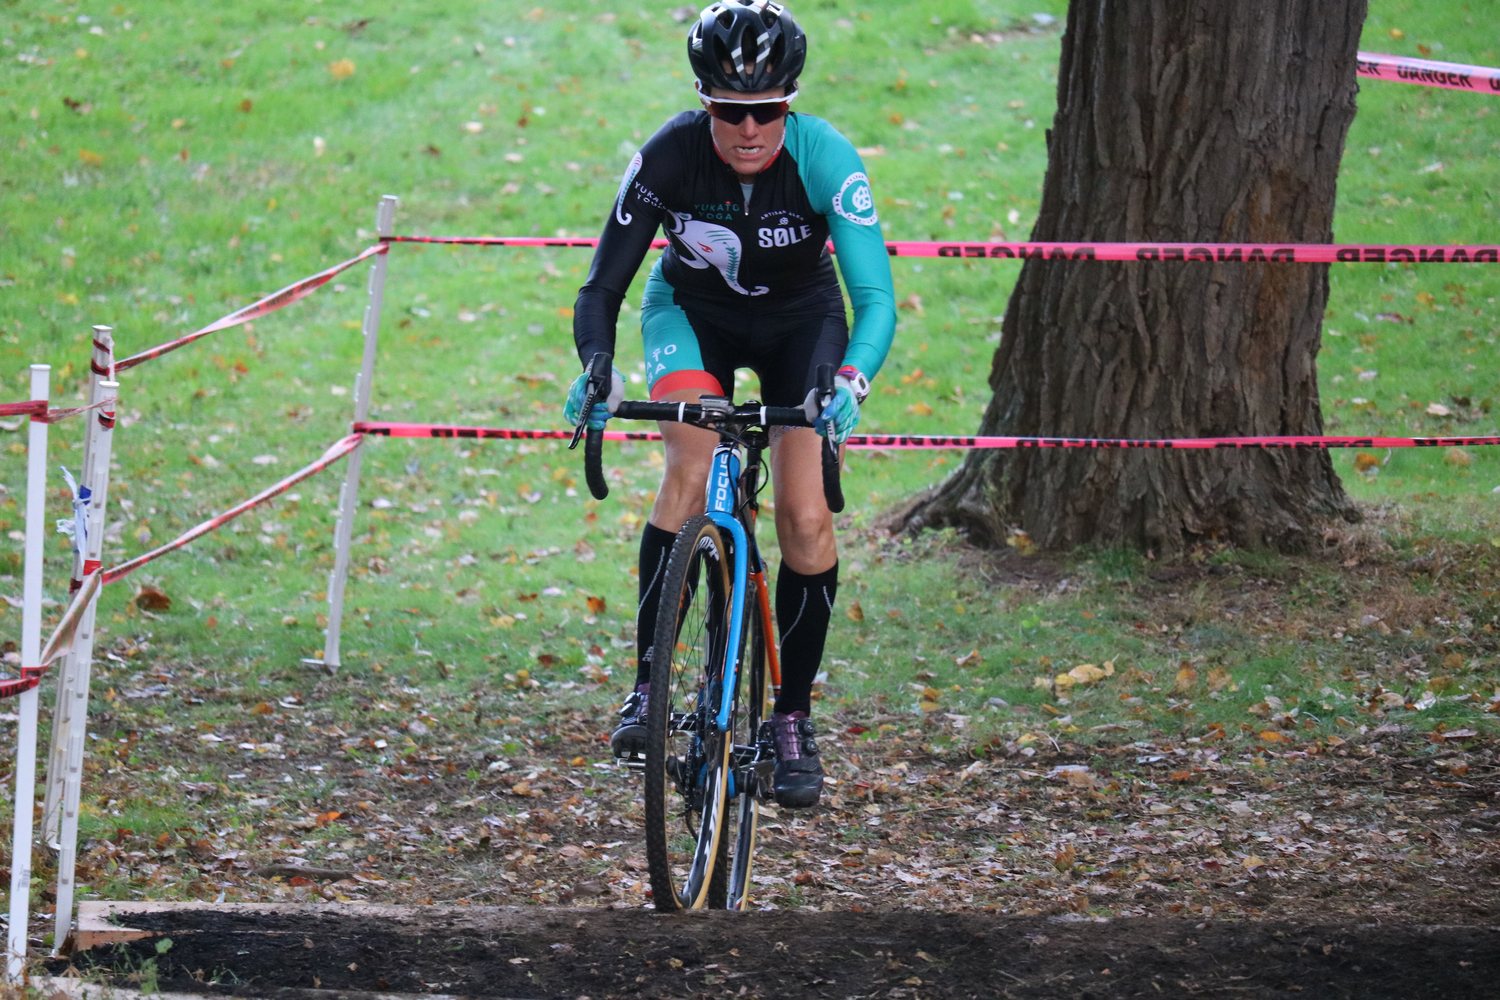
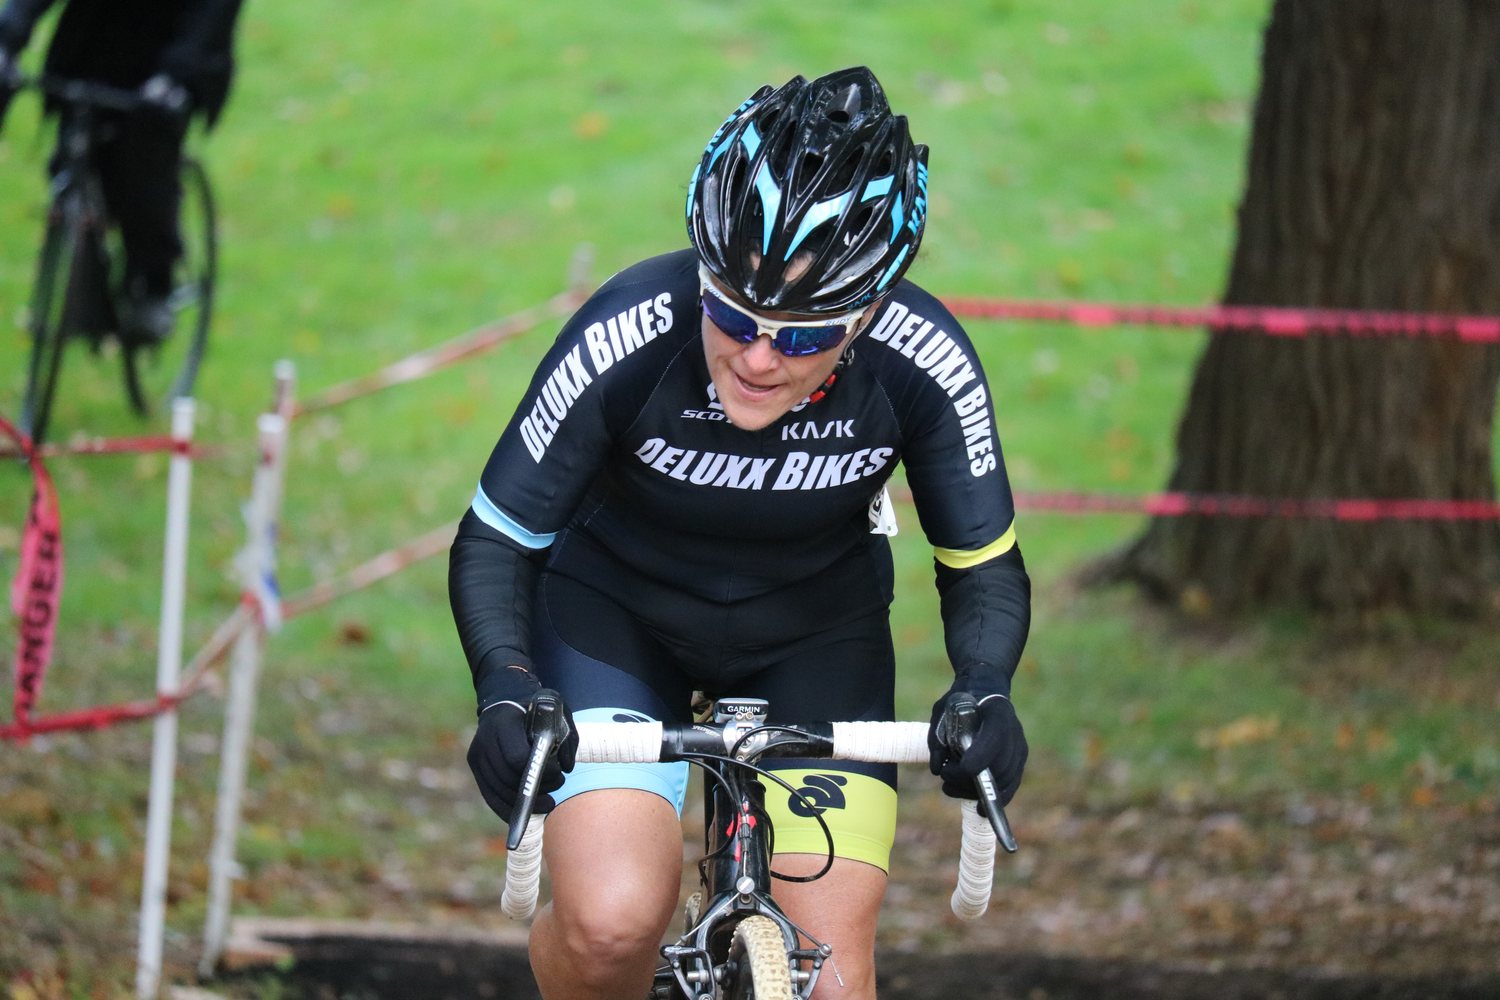
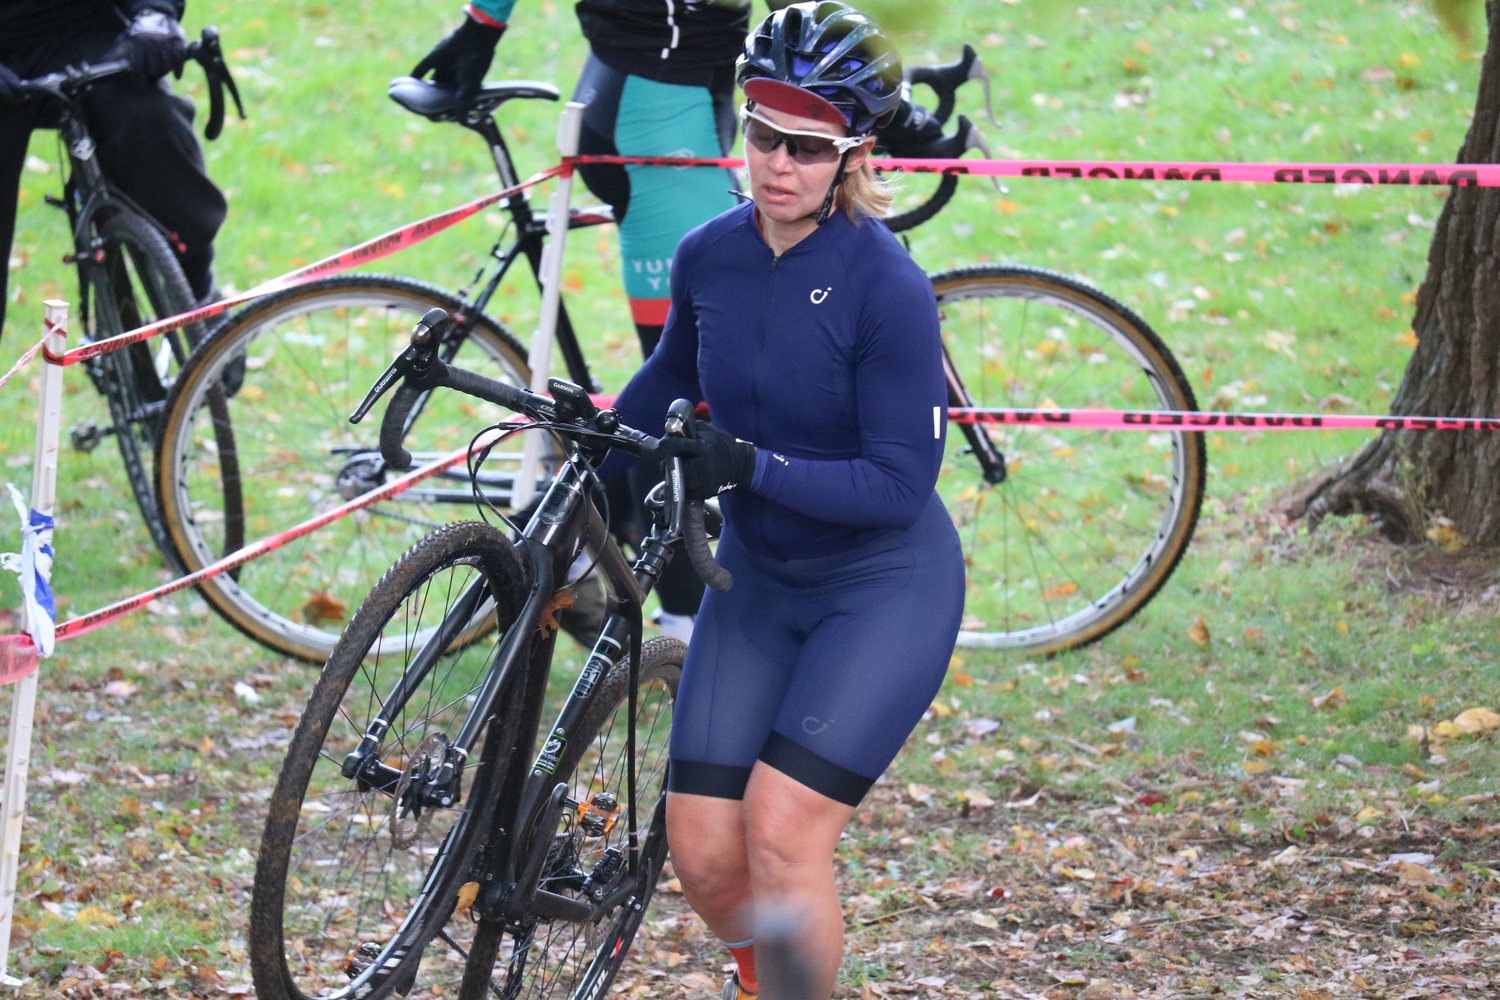
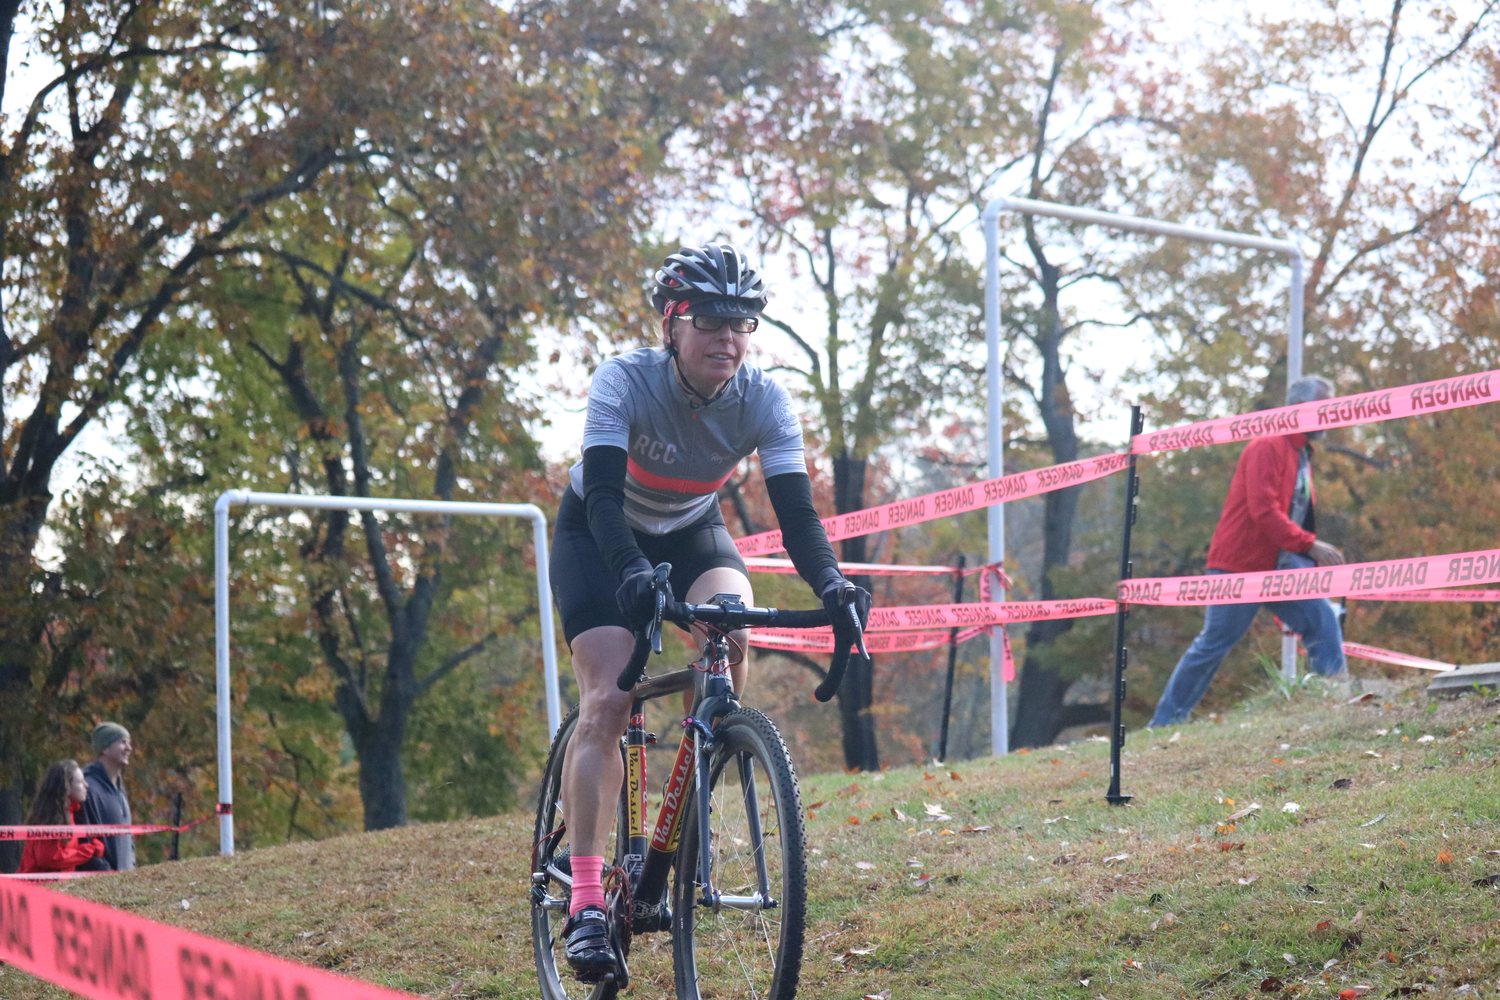
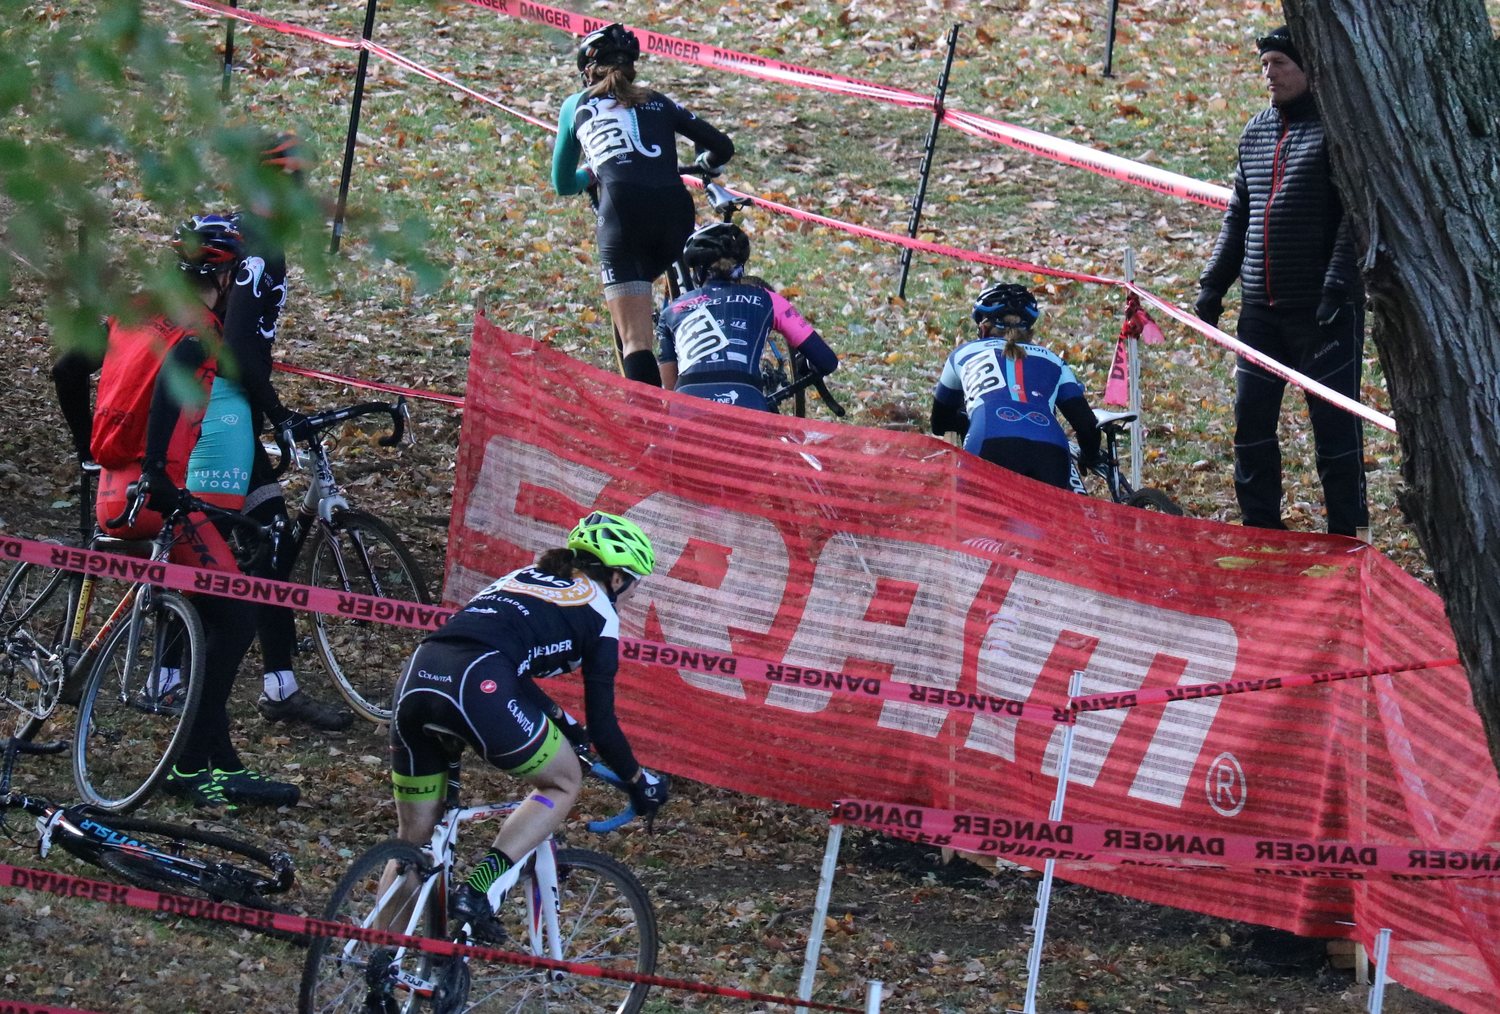
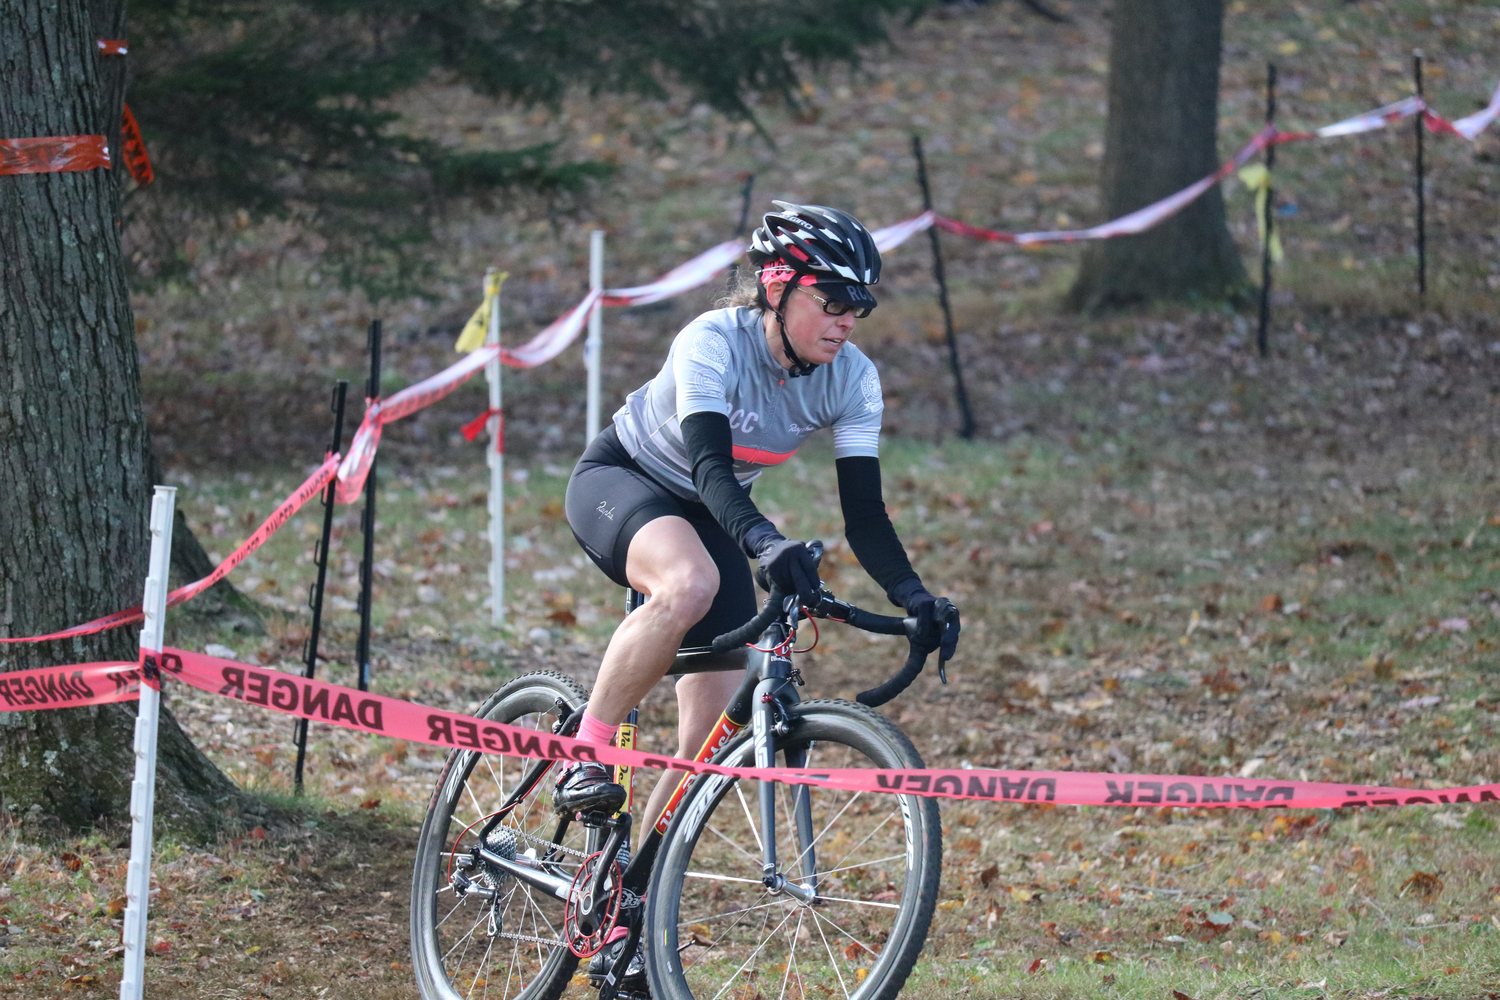
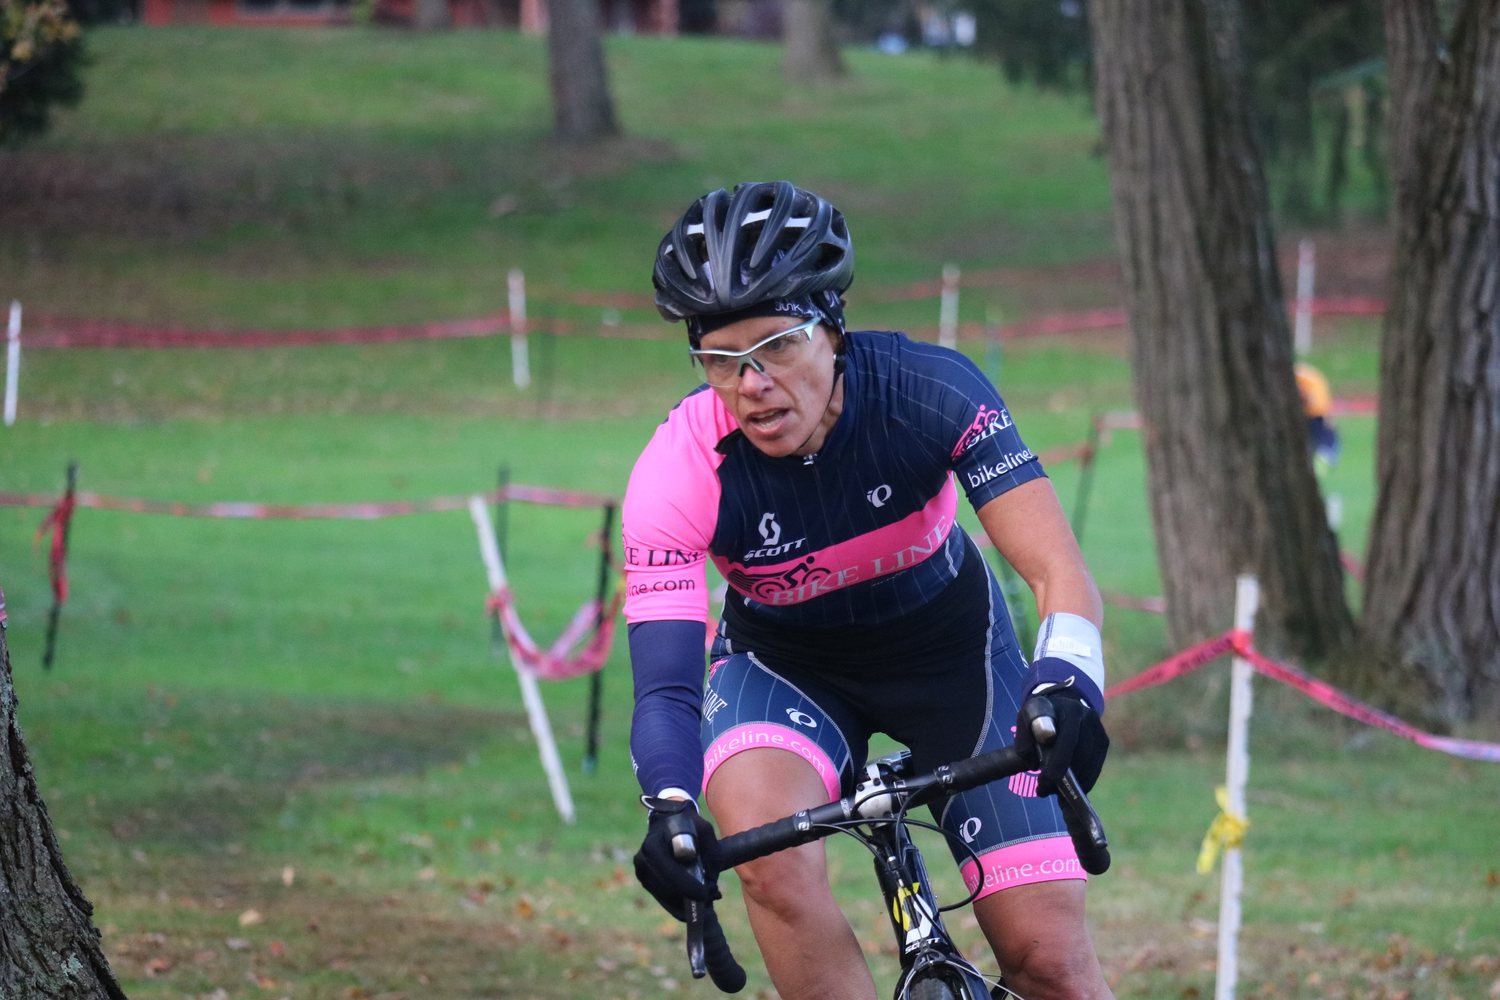
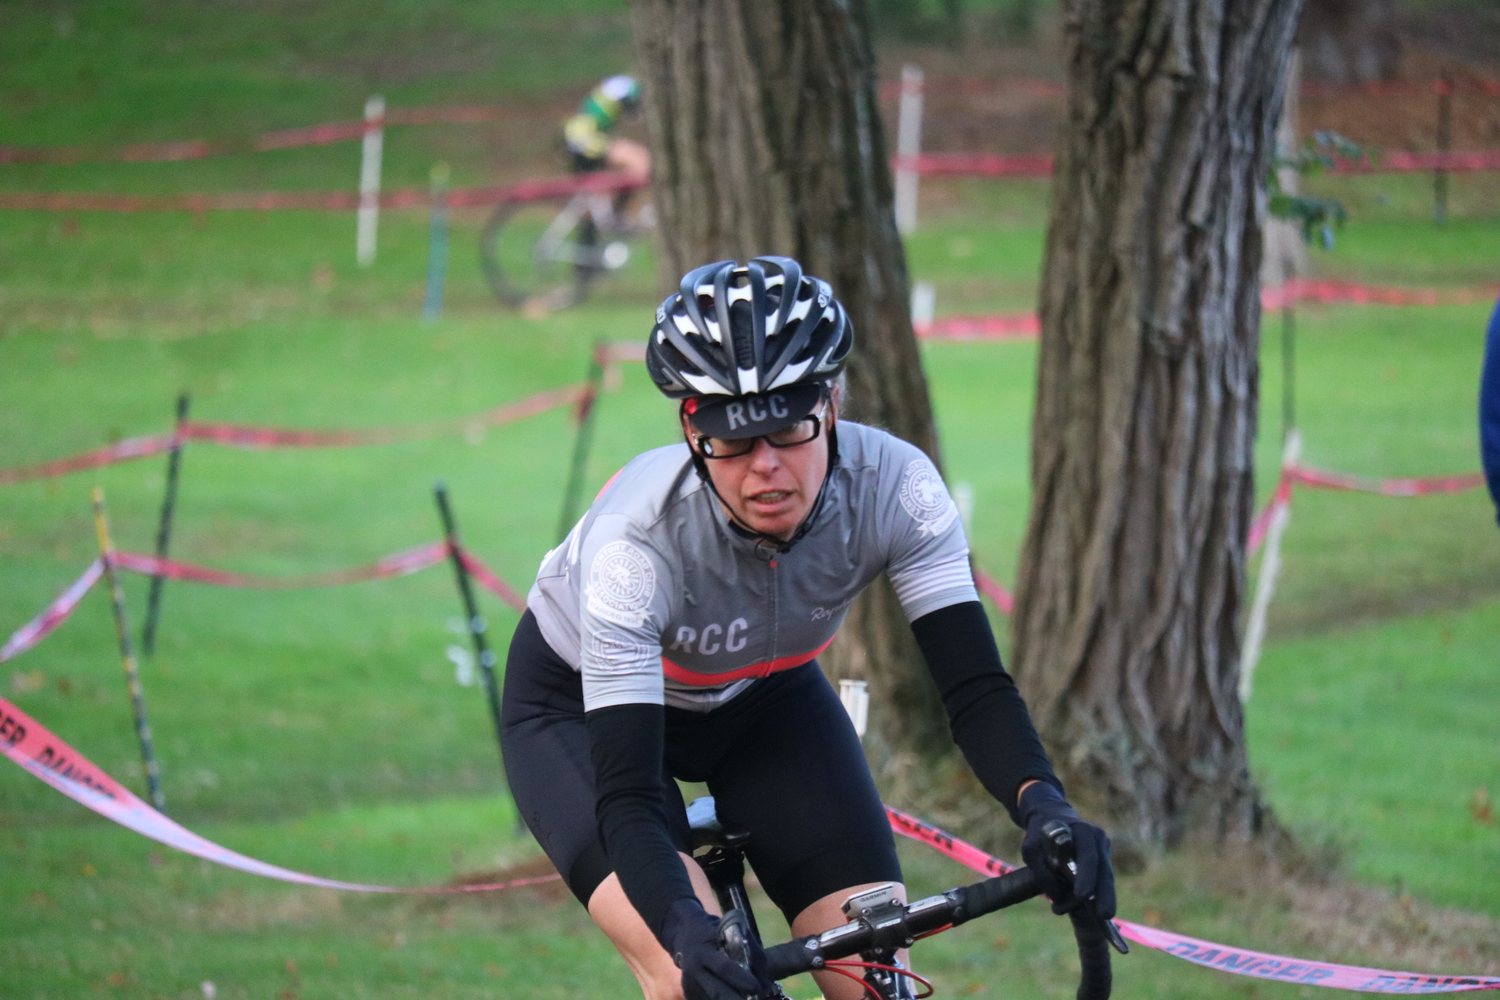
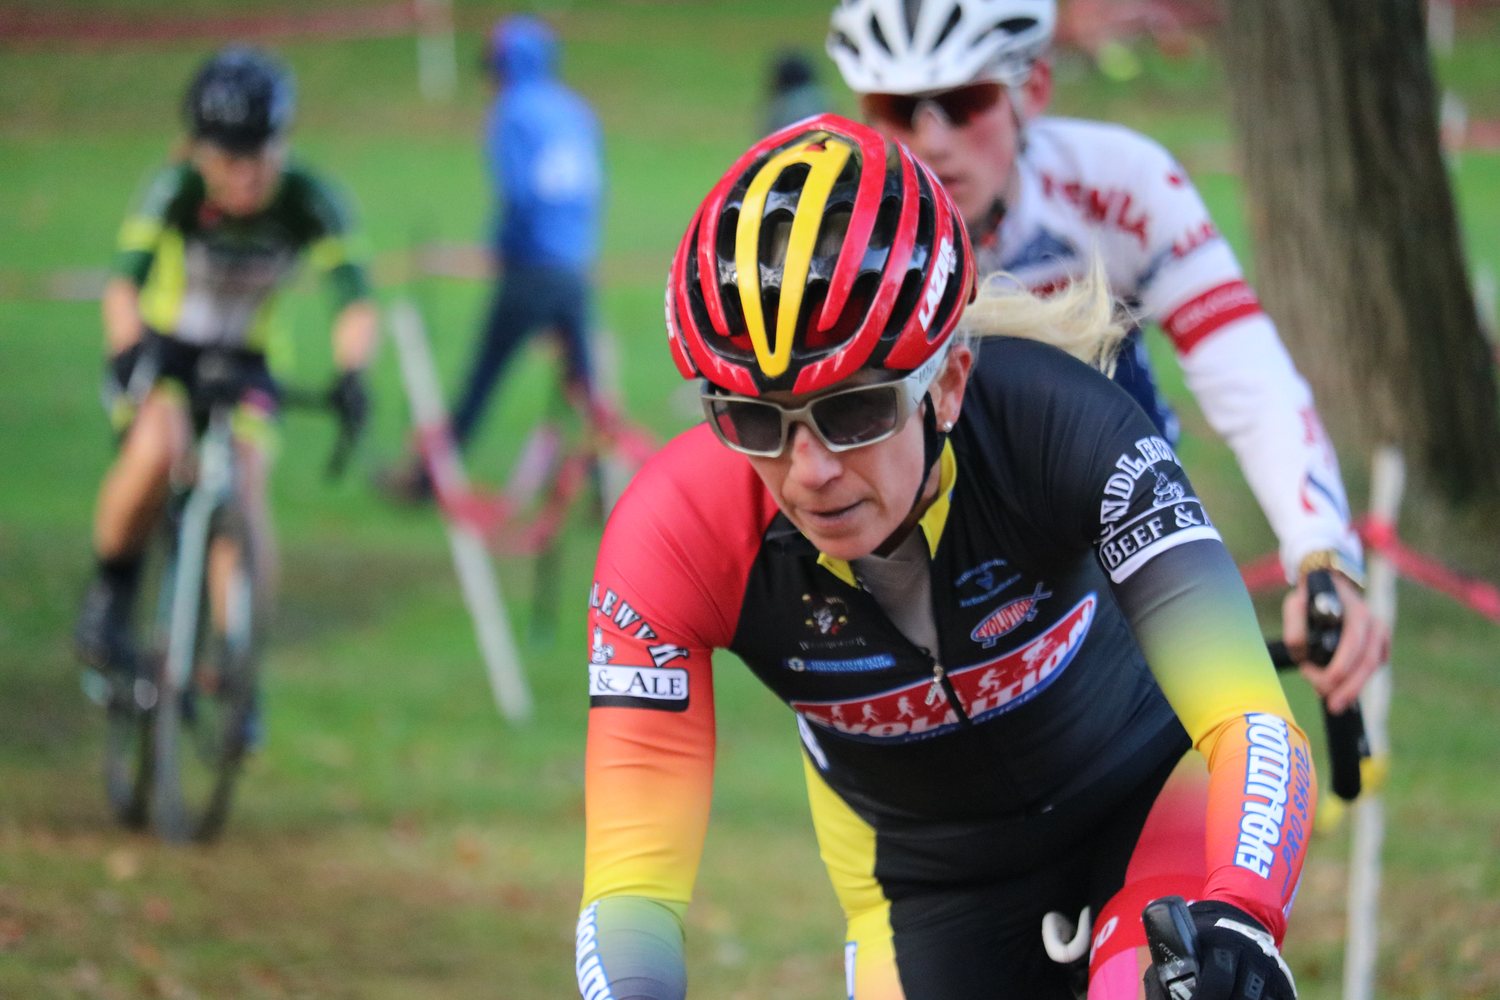
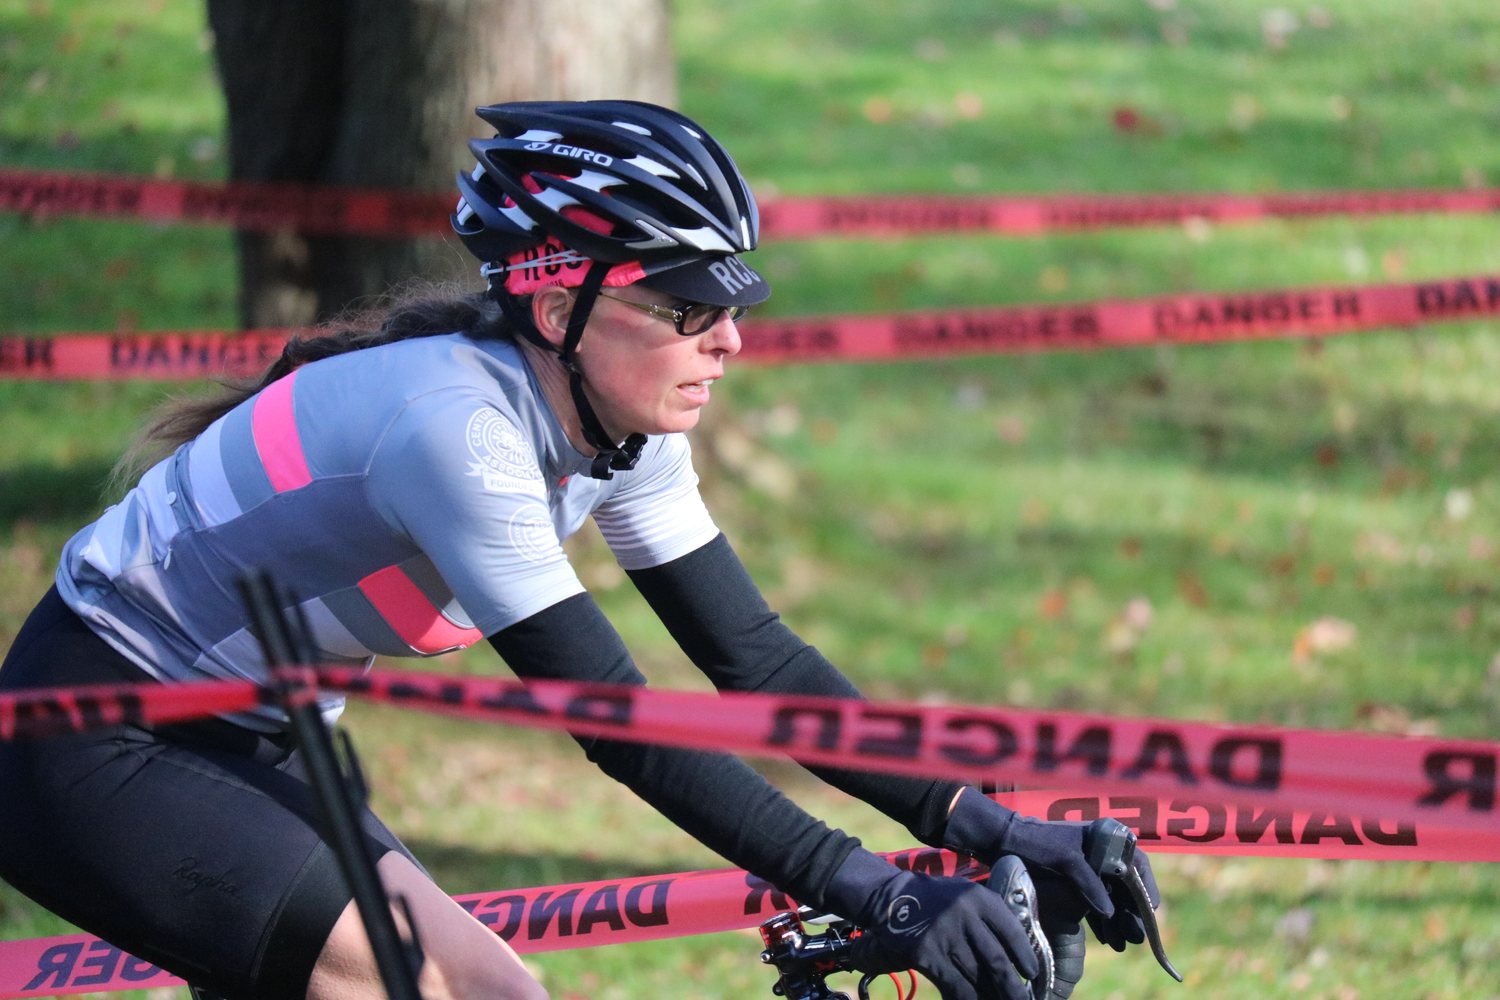
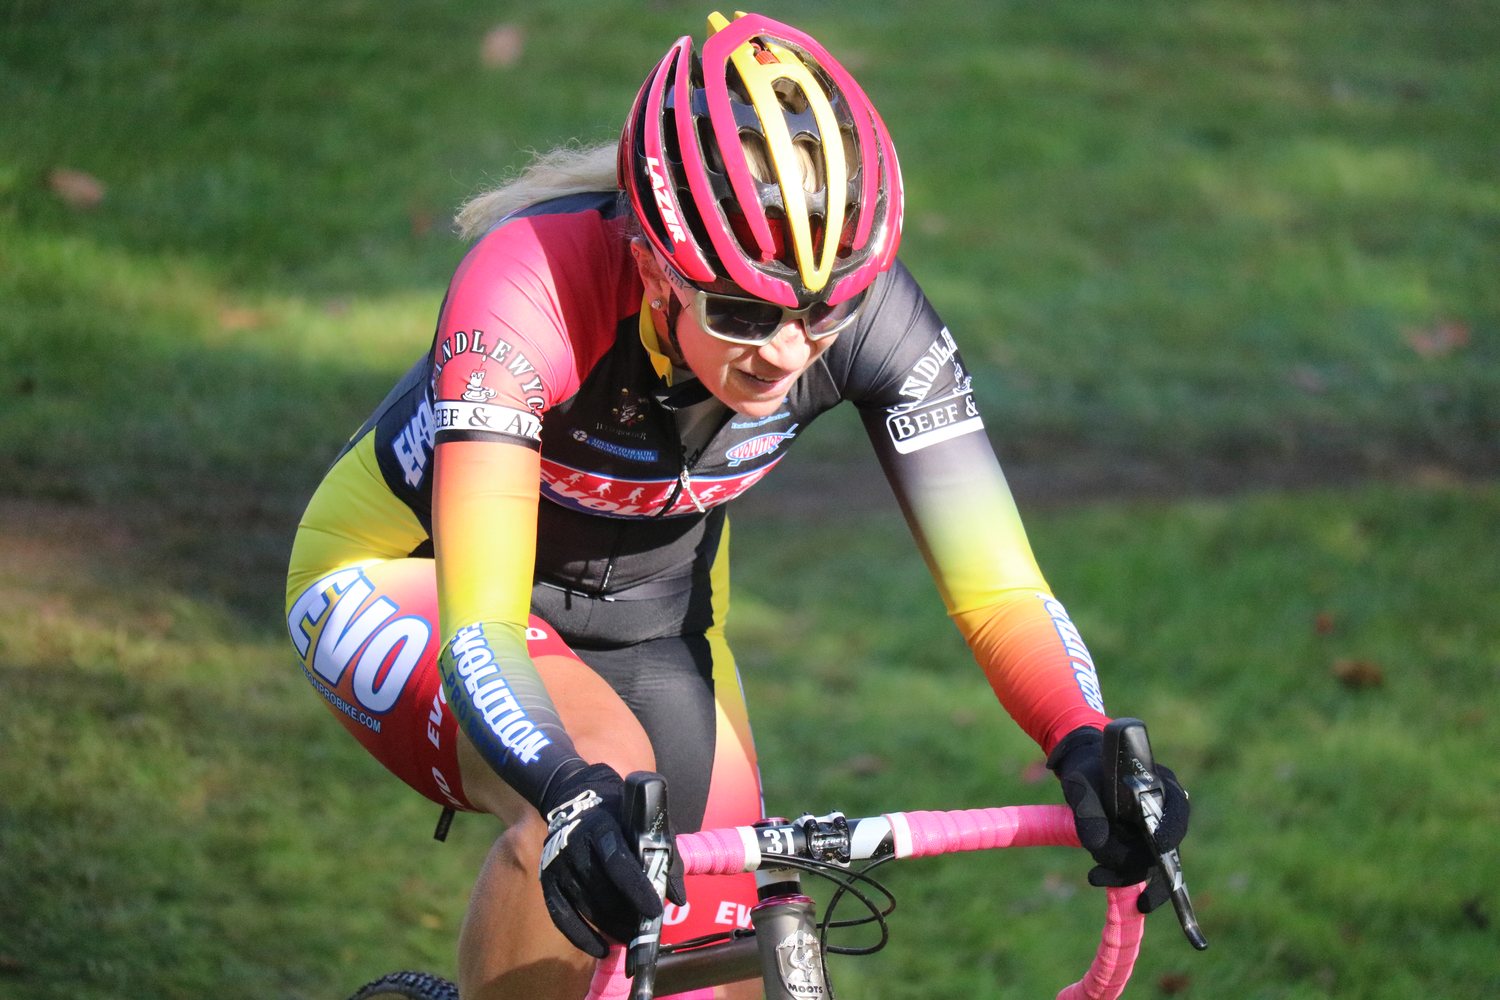
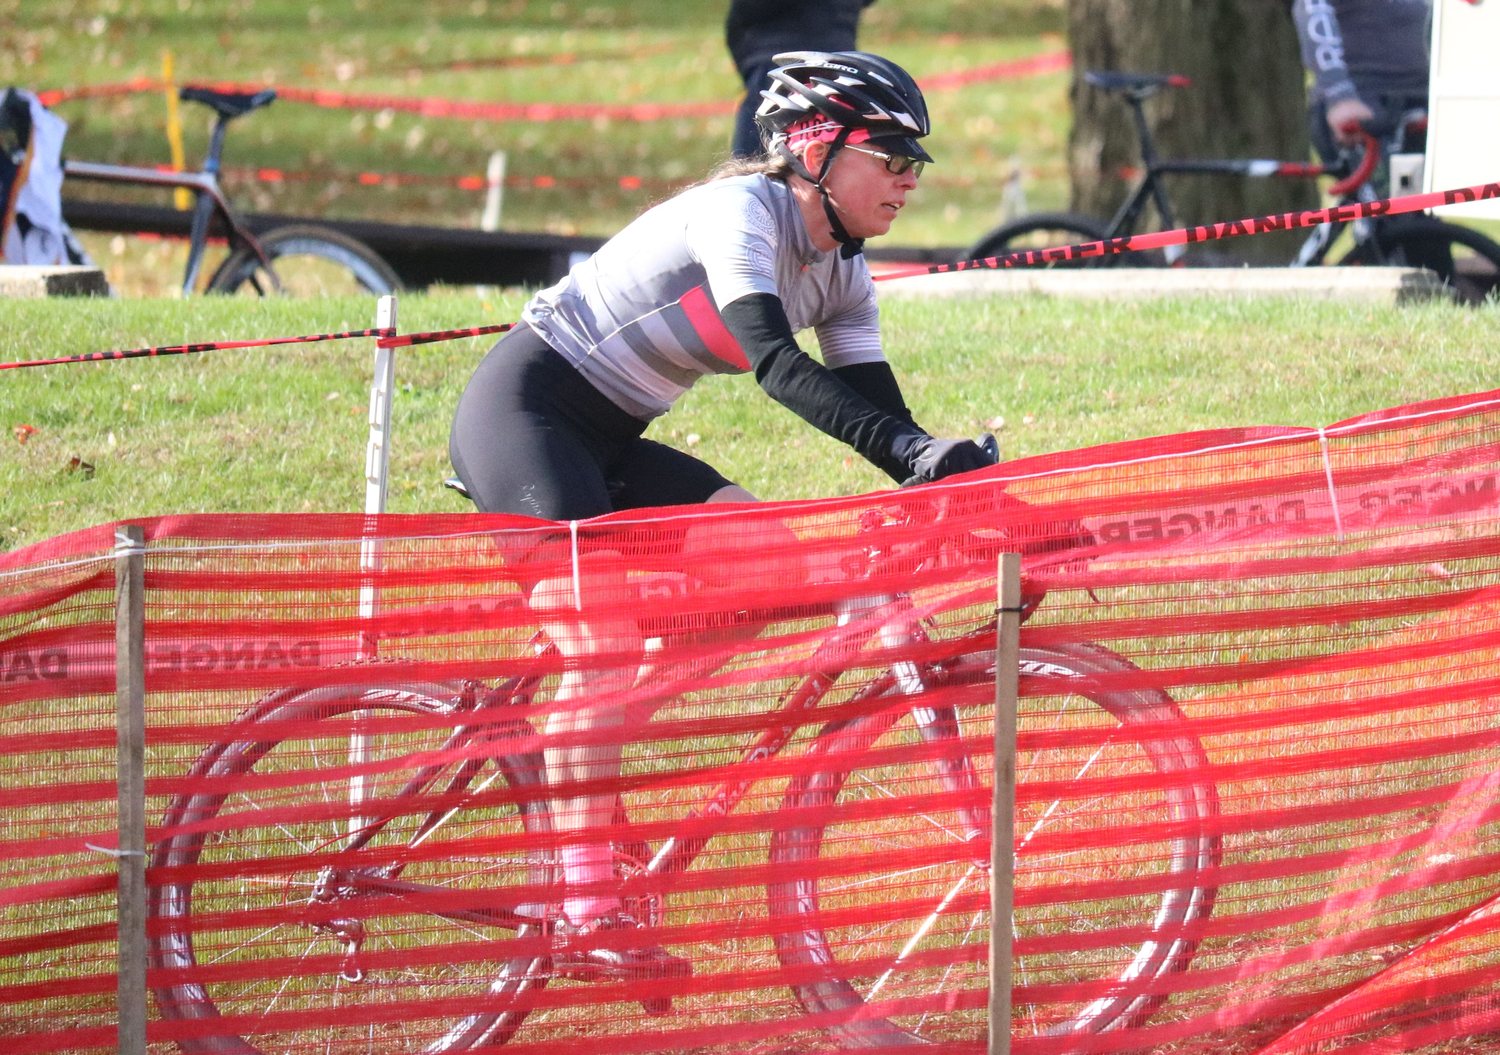
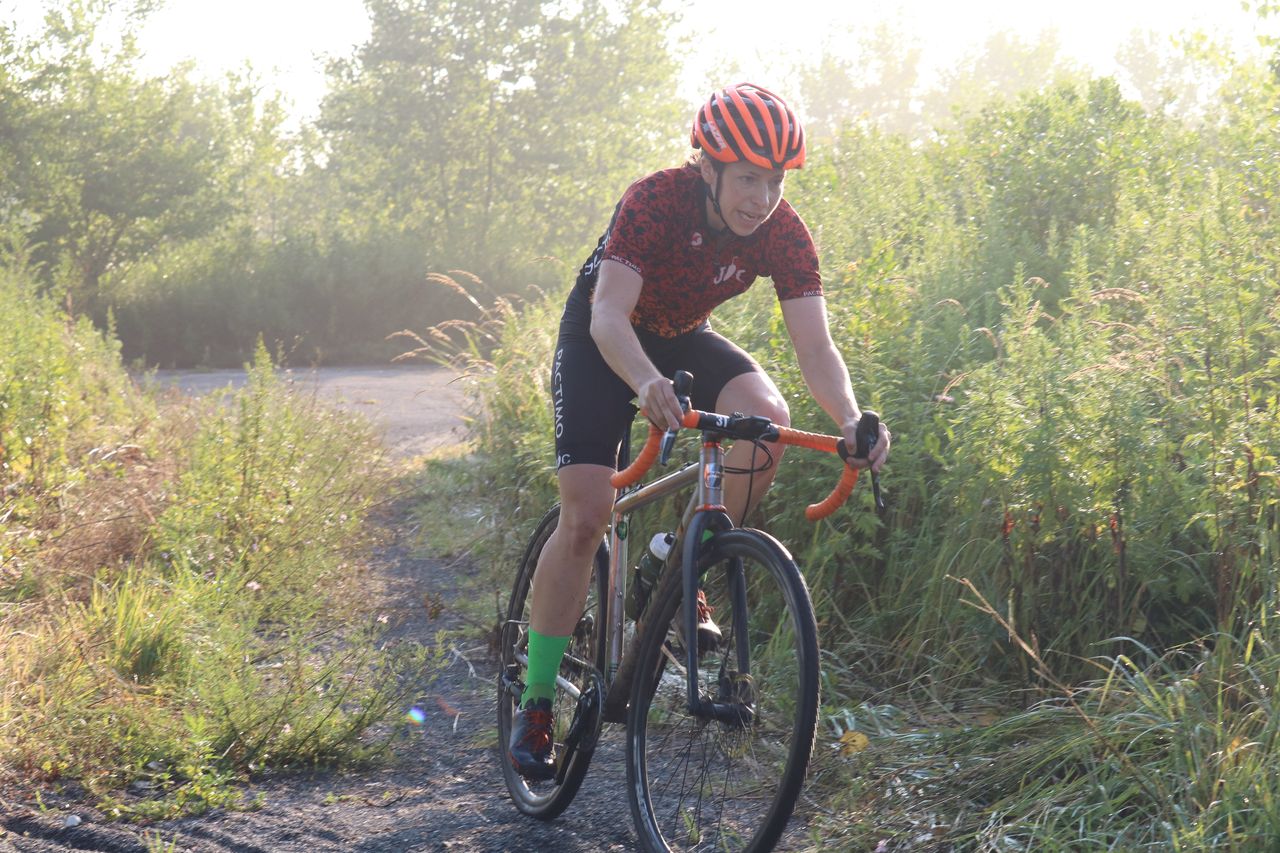
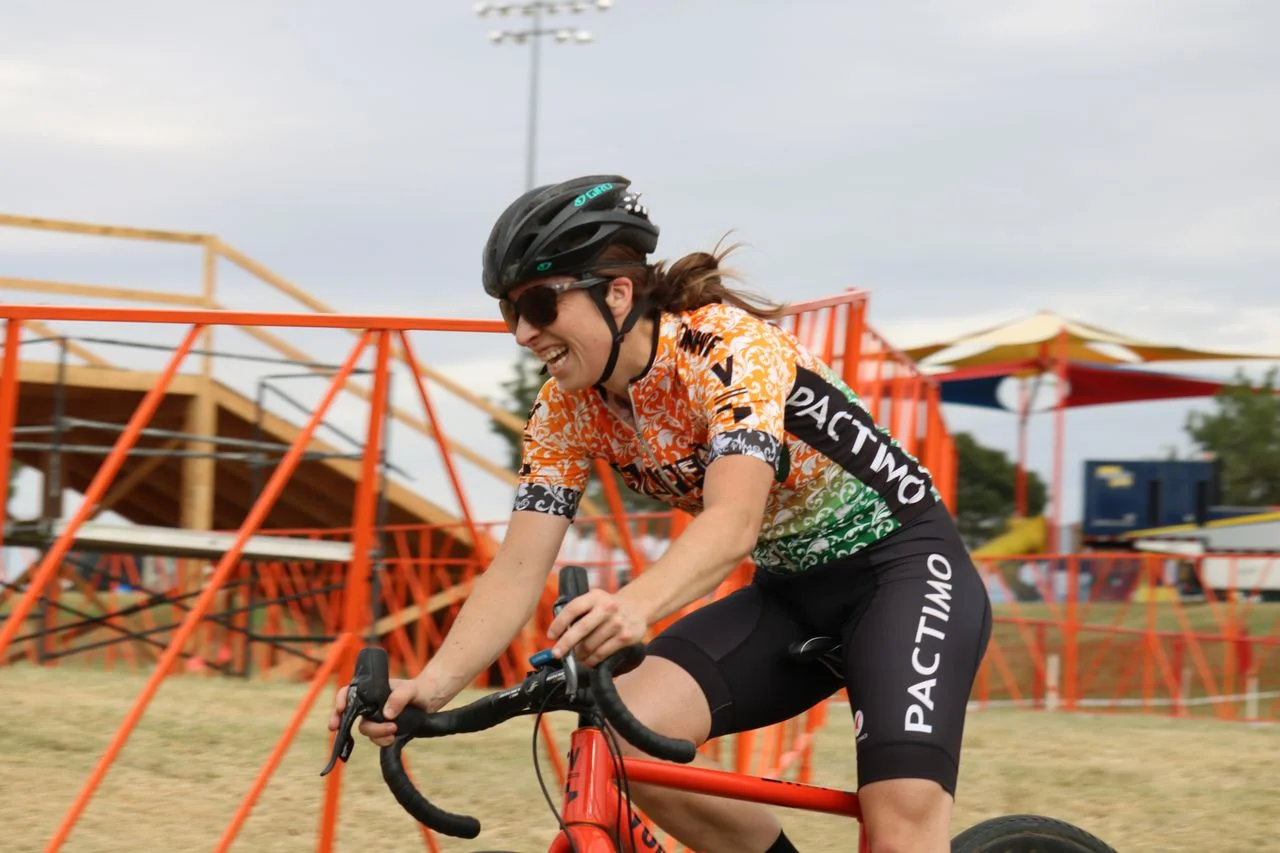
Still wondering if cyclocross is safe enough for you? Rather than focus on some of the hardest pro features that you won’t see unless you are an elite racer, I wanted to show off an honest look at the spirit of cyclocross in pictures. If you enjoy them, consider putting your name in the running for our development team before July 25th
 

Paying More to Downgrade: The Pricier Components That Don’t Make Sense for Cyclocross Races

2 Comments

Paying More to Downgrade: The Pricier Components That Don’t Make Sense for Cyclocross Races

Last week, we talked about the types of things you can do in the late spring and early summer to both mentally and physically prepare for the cyclocross season ahead. One of the factors we considered was thinking about upgrades for the bike, and adapting to them now instead of a week before the season begins. In this spirit, we wanted to take a closer look at the value (or specifically the lack there of) with certain “upgrades.”

You may have heard of the cycling equation of a $1 per gram. It’s a hilarious amalgamation of American currency and the metric system, where an upgraded part needs to subtract a gram of weight per dollar spent to consider the purchase a “good investment.” For example, if you wanted to buy a $200 carbon stem to replace your stock $40 stem, it would need to shave off 160 grams (or over a third of a pound) from the original part for the purchase to “be worth it.” (Note: I incorporate the value of the original part into the equation, with $200-$40=160 grams. Others only look at the price of the new part, and would require the part to save 200 grams).

Today we’re not going to talk about the merits of the “$1 per gram” equation, overpriced or great value upgrades. Instead, we’re going to be focused on the more expensive products that will perform WORSE over the course of a cyclocross season compared to their less expensive counterparts.

Yes, you read that correctly. There are literally products out there that run opposite the phrase “you get what you pay for.”

In most of these cases, these are absolutely wonderful products for road cycling or mountain biking that get lost in the translation to cyclocross. In a few other cases, there are products designed for cyclocross that would work ideally in a vacuum, but just fail to meet the practical needs of most (unsponsored) racers.

Here’s our list of some of the biggest culprits, to be avoided for your next cyclocross season:

1) Hollow Plate Chains.

I’ll let you in on a little secret: I’m a big fan of cheap chains for cyclocross, and not just because of my wallet. Sure, chains with solid pins and plates feel like they weigh three times as much when you hold it in your hand against a great road chain like the KMC X11SL DLC 11 (which retails at over $180), but all of those little openings in the latter chain are great places for dirt and sand to get lodged in.

Hollow plates.jpg

Hollowpin chains are becoming increasingly difficult to avoid, and often come stock on cyclocross bikes with a 1x drivetrain, but these chains are not nearly as much as a concern to me. Dirt can sneak into those hollow pins, but when it comes to chain wear, grit in a hollow pin will wreck far less havoc than the grit that collects between the pins and the plates.
Sand and dirt that makes its way into a hollow faceplate, on the other hand, comes in direct contact with the teeth of a cassette and chainring.

A few of these pins have filled with dirt, but they are not as problematic as mud-filled hollow plates.

A few of these pins have filled with dirt, but they are not as problematic as mud-filled hollow plates.

I would guess that hollow plate defenders would call this technology “dirt shedding,” suggesting that the holes in the place are a great way for dirt to escape compared to solid plates. As someone who has spent years on each level of chain, and has serviced more cyclocross drivetrains than I could possibly count, I can attest that hollow plate chains don’t shed anything; they’re a magnet for anything on a cyclocross course and they’re harder to clean, suggesting to me that drivetrain wear and performance will take a hit over the course of a season much faster.

2) Carbon Fiber Handlebars.

I fully understand the appeal of carbon fiber parts on a cyclocross bike. Anything to make your bike lighter and take a bit out of the sting of a jarring course makes sense to me. Of all components, a carbon fiber fork is my favorite in this regard. By far and away, my least favorite would be the carbon fiber handlebar. In fact, I’m pretty sure my personal hell would be me acting as a lone mechanic for a big cyclocross team that exclusively used carbon fiber handlebars.

Don’t get me wrong, I think that carbon in this regard is great for road and mountain bikes if you can afford the big chunk of change, but for cyclocross, I consider it to be a horrible liability.

Kate's alloy bars might be a disadvantage in weight, but they don't come with as many uncertainties after a minor crash on a cyclocross course.

Kate's alloy bars might be a disadvantage in weight, but they don't come with as many uncertainties after a minor crash on a cyclocross course.

The problem comes with crashing. Every time you do it, you must inspect parts no matter what they are made out of. I know this is a generality, but in most cases, cracked metal and failed welds are far more glaring than micro-cracks in carbon fiber. With mountain bikes, you can see much of the carbon on a handlebar like any other component. Even though road bikes are covered in bar tape, crashing shouldn’t be very common on pavement.

Crashing in cyclocross typically results in less/milder injuries. You’re racing at slower speeds, and when you do fall, there is a very good chance you are landing in dirt, mud, grass, snow, or sand instead of asphalt or rocks. However, crashing in this sport is a little more common, if not somewhat expected. Between finding the limits during pre-riding, and racing a course, I would have to guess that the Jalapeno Cycling Team of Kate and I must crash on average somewhere between 4-7 times per weekend. (Don’t let that number discourage you if you are thinking about racing for the first time; more cautious, lower category, riders can avoid crashing altogether by taking far less risks than we do.)

Alloy handlebars are not bulletproof, but unless they directly hit the ground hard, I generally don’t obsess over one of these 4-7 small crashes during a given weekend. As I said before, if that alloy is about to fail, usually it’s pretty obvious, even if it’s wrapped up. Cracks in carbon, on the other hand, can sneak up on you, and those 4-7 small falls would dictate that I unwrap those bars 4-7 times per weekend and inspect the surface for microcracks.

So why do I call this an expensive downgrade? Because I know human nature. Even the most patient mechanic or rider isn’t going to unwrap and re-wrap bars that often, and it will bite them.

You might think I’m being dramatic, but I’ve seen enough handlebar failures in the Elite and Masters fields. In the case that sticks out most in my mind, a Pro rider who constantly podiumed in American UCI races admitted to me that his handlebars breaking on Sunday during the KMC Cyclo-Cross Festival were almost certainly the result from a crash he bounced back from on that Saturday.

3. “Team Edition” Cyclocross Tires

Racers obsess over tire choice. Twitter is filled with lobs of insults between Elite and Master Cyclocrossers who use cotton casing tubulars (Dugast, FMB, and Challenge) and those who use pre-coated sidewall tires (Tufo and Clement). Emotions can run high during debates over the best tread out there. So it would be easy to mistake a very expensive tire as your best choice because it boasts features like being the most supple, having the best grip, or weighing the lightest.

When it comes to pulling out your wallet for tires, though, the most expensive tires, sometimes labeled “Team Edition” tires, are more likely to offer performance losses during the course of your season.

Okay, so I’ll admit I’m being a little weasely calling these tires an expensive downgrade, because a fresh pair of Team Edition tires will outperform a fresh pair of standard tires. But the advantage doesn’t last for long.

Several years ago, I was invited to sit down with the designers and engineers behind one of the bigger tubular tire brands, who gave me a sneak peek of the high end prototypes that their European teams were racing on. They admitted that they had been reluctant to release this lighter, more supple compound to the wider American market because we often demand plenty of mileage out of our tires (some of us will go through a few seasons on the same tire, others will expect it to last through both cyclocross and gravel conditions).

Many non-"Team Edition" or "Team Issue" tires, like Kate's Clement PDX shown above, come with a thicker tire compound. While this makes them heavier and less supple, it also gives them a big edge in terms of lasting wear and duribility.

Many non-"Team Edition" or "Team Issue" tires, like Kate's Clement PDX shown above, come with a thicker tire compound. While this makes them heavier and less supple, it also gives them a big edge in terms of lasting wear and duribility.

When I asked one of their sponsored racers (who was ranked in the top five in the world at the time), how long he thought he would use the same set of tires, he guessed that he only used them for several weekends before his mechanics ripped them off, threw them out, and re-glued fresh ones to his wheels.

Less than two weeks. Four days of racing. Let that sink in for a while.

I know that’s an extreme case. With a near unlimited supply of sponsored tires and full time mechanics at their disposal, the highest level Belgian and Dutch athletes have every incentive to swap their tires over at the first sign of tread wear. Except I’m not making a nitpicky case.

Unlike those athletes, amateur racers and privateer elite racers will likely put more mileage out of a single set of tires during those weeks. Warm ups, pre-rides, pre-race day openers, Wednesday Night World practices, cool-downs… the average North American racer is FAR more likely not to swap their race wheels for a set of training tires, and all of that tire time is likely to translate into wear.

The grippier, lighter compound of those higher end tires might sound attractive at the onset, but if your chevrons or file treads are looking more like a beat up 33mm road tubular come October, you won’t exactly be overtaking anyone in a corner. 

(One important note on the “Team Edition” designator is that it is not a universal one across all tire brands. FMB has standard tires and Pro tires; the latter models, as of this writing in the 2017 offseason, can be recognized by their green or pink sidewalls. These Pro tires actually have a more durable casing and are designed with an increased longevity in mind.)

4. Shimano XTR Pedals

This one is often mentioned online on many cyclocross-focused websites, but considering that this one is easily the biggest complaint I still get from newer cyclocross racers, it bears repeating here. XTR pedals are a dream for dry conditions and mountain biking. They are far from ideal for mud.

Judging by the fact that these XTR pedals have won readers’ choice awards from Cyclocross Magazine in the past, I’m guessing that this one might be a little more subjective than the other components on this list. Still, objectively, the distance between the axle and the engagement of the pedal is much smaller than the less expensive Shimano models, allowing far less room for mud to go.

Unlike the last item on our list, looking at what the pros use is a good indication. Unless they are using prototypes of XTR pedals with taller engagement claws, the vast majority of Europeans use the XT pedals instead, which are not nearly as pricy as Shimano’s top shelf pedal. There are also plenty of low weight, better priced SPD pedals that offer cyclocrossers a great retention without sacrificing the ability to clear mud. Some of the favorites we’ve tried this offseason belong to Ritchey and iSSi.

5. Power meters for your race day wheels

(Note: This is one product on the list that Kate and I disagree on. She says that there are enough lessons from race day power numbers to avoid calling this one a “downgrade.” As I explain in the following section, I disagree.)

If you have the time and passion to sift through your training files, or you have a coach who does all of the analytical reading for you, a power meter is literally one of the best training component upgrades you can get. For racing on the road, especially at events like time trails, or during triathlons, power meters are a wonderful guide to measuring your effort.

If the main reason for buying a power meter is to read your watt output from cyclocross races, you are not only better off spending your money elsewhere, but you are putting your performance at a slight disadvantage.

Cyclocross is a sport of far too many variables compared to racing on the road or the track when it comes to cleanly reading power for a purpose. Did you dismount earlier on one lap, did you get caught behind someone with no handling skills in the narrow back section of the course, did you take the lower line that allows you to pedal harder but puts you in a terrible position for the next corner, did you choose a completely different gear when you went through the sand on lap three, did your back wheel lose two psi during the last half of the race?

These questions all effect the readings, and none of them even takes into consideration that you might have a pit bike that you use, which might have a different tire tread, tire pressure, calibrated power meter (in the extremely rare case where you decided to splurge on a power meter for both bikes anyhow).

Don’t mistake my meaning. I think that power files from cyclocross races are extremely interesting, especially when you can actually keep track of how you rode differently on a particular lap, or (more importantly) when you look at the much bigger picture and analyze your lap averages. However, the data from your training days will comparatively be much more readable (and beneficial to decisions you make about adjusting your future training and scheduling an off-week to avoid overtraining).

I know this doesn’t have to be a choice between using a power meter either during training or racing, and that you can have both. In light of this, race day wheelsets with a power-measuring hub might be a bad investment if you are unwilling to ride the “Team Edition” tubular tires glued to them during your mid-week training rides.

Secondly, those power meters also have a weight penalty attached to them, not for added performance, but just for the benefit of measuring power. In my experience with the vast majority of current power meters out there, the more consistently accurate the power meter, the heavier the weight penalty. I personally have a power meter on my road bike, and I feel like the weight is an acceptable penalty for the feedback I get mid-race. For cyclocross, those mid-race power numbers will provide useless information during 99% of the race unless you’re on a flat grass oval, and as I’ve already stated, your post-race viewing of those numbers are not nearly as beneficial as training day numbers.

When I used to race cyclocross with a power meter years ago, I had a crankarm-based Stages. Even then, if I knew the course was going to be muddy, I usually just swapped it out with the crankarm that the bike came with on race day because 1) the original crankarm was carbon and much lighter, and 2) I decided that I didn’t want to risk destroying a $700 power meter if a mechanic was a little overzealous with the power washer.

A factor of this list is admittedly risk vs. reward, and the upside of the data you are getting on race day just isn’t enough to make power meters avoid the downgrade designation.

6. Cooling Brake Rotors and Carbon Rim-Specific Tubular Glue

I bet you’re scratching your head at this pair, but yes, they’re both what I consider more expensive downgrades, and for a similar reason. But before I dive into why these are on my list, please note that this list pertains to cyclocross racing, and not gravel and I’ll explain why.
Both vented rotors (such as Shimano’s IceTech or Jagwire’s Elite CR1) and carbon rim-specific tubular glue are designed to mitigate the effects of heat buildup during long, consistent braking. None of these should seriously come into play for cyclocross, and not because cyclocross takes place in cold weather.

On the road bike (or an all-mountain/downhill/trial bike), putting constant pressure on disc brakes during a long descent is often a fact of life. The heat buildup from this constant braking is magnitudes higher than grabbing a fistful of brakes all at once, even if that latter braking is far more aggressive in the moment. The aluminum plates in “cooling” or vented rotors, don’t exactly keep the brakes cool, but rather draw the heat away from the braking surface and towards the center of the rotor, which prevents any heat problems with your brake pads or hydraulic fluid on those long descents.

Same with carbon rim-specific tubular glue. The goal of this product, which is close to twice the price of your standard rim cement on average, is to resist the heat buildup from a carbon rim paired with a rim braking system. Contrary to rumor, this product is not “kinder” on carbon fiber rims. (Obviously, if your cyclocross bike has disc brakes, there will be no heat buildup at the rim).

While some cyclocross courses have a few longer descents (the pre-2016 Rochester Full Moon Vista course, Dallas Resolution Cup, Charm City CX), even these 6-10 seconds worth of braking won’t come close to creating the same heat that road and mountain bikes will be able to create, and I am mentioning the extreme examples. The vast majority of cyclocross courses only require seconds of braking at a time.

This sharp feature at Cycle-Smart International looks steep, but only a few seconds of braking are needed, if that. Hardly enough to head up either brake rotors or a rim braking surface.

This sharp feature at Cycle-Smart International looks steep, but only a few seconds of braking are needed, if that. Hardly enough to head up either brake rotors or a rim braking surface.

What are the disadvantages of these products? Well, for vented rotors, the biggest drawback is the weight penalty that comes with the added aluminum inserts. That’s obviously not an extreme loss in grams, but why pay more for a product that is slightly heavier than the non-cooling rotor counterpart. For the carbon glue, the disadvantage is far worse, probably one of the worst on this list.

While carbon rim-specific tubular glue is acceptable at holding a tire on that is often held at 90-140 psi, I have never been impressed with how weak it is resisting the lateral forces of a tubular cyclocross tire at low pressure compared to standard rim cement. What does that mean? Well, your 20-25psi tubular tire has a great deal of unique forces on it, between tight, fast corners, or off-camber descents. In situations where your tire wants to rip off sideways from your rim, the standard rim cement holds a tire far better, in my experience, than carbon rim-specific tubular glue.

Again, this is when applied to cyclocross. If you use your cyclocross bike in the spring for gravel racing, you will likely see plenty of long, winding descents coupled with loose gravel that would encourage checking your speeds.

The Jury is Still Out on a Few

Certainly, there are likely other products that we have overlooked, and we’d be thrilled to hear about them from you in the comments. These are products that hamper your season-long performance but cost more than another common product. So while large jockey wheels with ceramic bearings might not be the best dollar per watt benefit, I think it would be hard to call it a downgrade from the standard derailleur cage and jockey wheels.

There are plenty more components that we didn’t add because we believe they are far more of a subjective downgrade, or we just haven’t tested them out long enough in cyclocross.
I actually really enjoy dropper posts in cyclocross, but detest suspension seatposts and stems, which I feel hamper my handling and create bad habits. Again, I know that these are more of person by person cases.

The real purpose we wanted to share though is to break from the habit of thinking that a higher price automatically equates to a higher performing component. Electronic shifting has already taken road cycling by storm, but, with the exception of Shimano’s XTR Di2, I would never swap out my Force1 for a SRAM, Campagnolo, or Shimano electronic shifting group set; I just love how little my rear clutch derailleur has a mechanical mid-race. (Having said that as a side note, I’m guessing this claim will be outdated by cyclocross season. SRAM must have a clutch eTap system in the works for Fall 2017, just in time for no one to train on it before the season begins. You heard it here first.)

We’ve already received a half dozen emails about the new Fox AX fork for cyclocross, and while we have some pretty poignant opinions about it, we just haven’t given it a solid test to see if it would give serious value to a cyclocross season, or its added weight might just put it on this list next.

Looking to keep up to date with the latest blogs and news from Jalapeno Cycling? Be sure tosubscribe to our newsletter to get our cycling tips delivered right to your mailbox. Also, if you are looking to start a cycling routine, and are close to the Bloomfield, New Jersey area, consider signing up for one of our cycling classes with more info to be found here.

2 Comments

Come Test Your "Tour of Flanders" Legs at Jalapeno Cycling on April 2nd, Win Great Prizes

Come Test Your "Tour of Flanders" Legs at Jalapeno Cycling on April 2nd, Win Great Prizes

The Tour of Flanders is one of the major classic races, and this year marks its 101st run. In our last newsletter, we said Jalapeno Cycling would be streaming many of the Spring Classics live in our shop, but for the Tour of Flanders, we are taking it a big step further.

Starting at 7:00 AM on April 2nd, and lasting through the race coverage, Jalapeno Cycling will be having a contest for everyone to simulate riding one of the iconic course sections.

The Rules for the Faux Pro Competitors:

1) Claim your free spot to compete on mindbodyonline.com. (We are maxing out with 16 total riders for this event, so we are expecting the spots to fill up FAST.

2) Either reserve one of Kate or Andrew's Von Hof bikes by emailing us, or bring your own mountain, road, or cyclocross bike.

3) Show up at least 20 minutes before your slot and ride your heart out.

The Rules for Spectators:

1) Cheer on the Men's and Women's Pros on our TVs.

2) Cheer on the Faux Pros in the back attempting to race on the same grade hills as the pros.

3) Don't throw beer or cobblestones at the riders.

What to Know:

1) Entering the Tour of Flanders challenge is free, but you will need to sign up to do it in order to claim your trainer spot.

2) The competition is over distance. Everyone will be riding the same length of the course. This means that your ride could be anywhere from 20 minutes to 45 minutes depending on your ability.

3) While we are not yet disclosing what section of the course we are using until the week before, you can expect that there will be at least one serious grade. April 2nd is not the day to bring a bike with zero climbing gears.

4) Don't schedule a time that interferes with the Pro Tour's finishes if you want to see the live finish. Currently, the wise UCI predictors say that the Pro Women's Race will finish around 8:50 AM EST and the Pro Men's Race will finish around 10:30 AM EST in the fastest case scenario.

Prizes:

-Both the male and female rider with the best time will get one of Jalapeno Cycling's custom #RideSpicy Pactimo kits (a $160 value per winner!)

-The rider who comes closest to the average finishing time (note: not the median rider, but the average time) will score one of our custom Faux Pro caps made by Rothera Cycling.

Preventing Aches and Pains with Strength Training

Preventing Aches and Pains with Strength Training

When coaches talk about strength training for athletic activities such as cycling, often people think of building muscle mass. If done properly, strength training has the ability to create a stronger pedal stroke and running stride and prevent pain from endurance sports without building mass. In today's coaching blog, Kate Cumming examines a few workouts that get people's seasons started off right, but are also designed to combat the stresses of sitting all day at work and on a saddle.

by Kate Cumming

Too often, riders talk to us about aches and pains related to riding and racing. Whether it’s nagging knee pain, a lower back that gives out when the going gets tough, or a stiff neck that tightens up with each bump, symptoms of muscle imbalances really flare up by the last few races of the season.

I have been involved in several conversations lately where athletes indicated they felt one-dimensional and weak at the end of their race season. These feelings are not surprising as the repetitive nature of endurance sports will lead to muscle imbalances over time. While a bike fit or equipment change may help to reduce these problems, returning exclusively to the repetitive movement that created these imbalances will lead to the same aches and limitations over time.

As your early season training resumes, strength training should become an integral part of your weekly plan. With more sport-specific focus on endurance training, you will be able to incorporate strength training without feeling like you cannot hit the top end power or pace numbers you would be fighting for during race season.

Although there is not a one-size-fits-all solution to strength training, the ideal starting point for most athletes is glute activation. Active glutes have the ability to generate significant power through the pedal stroke or running stride and can also help prevent injuries. If you find that your lower back takes the brunt of steep climbs, your hip flexors cramp or ache, your IT bands (or in very loose terms, the band that runs on the sides of your leg from your hip through your knee) are tight or your knees gravitate towards your top tube while riding, your glutes are probably not doing their share of the work. Countless other scenarios can involve your glutes, but these are some common scenarios we are seeing with our athletes.

Thanks in part to significant amounts of time spent sitting, our glutes often remain dormant when we need them most. Begin building your strength foundation today with glute activation exercises. Once your limitations are resolved, the focus can shift to more time spent focusing on sheer strength and then explosive power as your training progresses.

To get the glutes firing, focus on these three exercises:

1. Glute bridge: Begin on your back with knees bent and feet about shoulder width apart. Exhale and push through your heels to lift your hips towards the ceiling. Engage your glutes at the top and inhale and return to the starting point. The single leg version of this exercise is a great progression and will also help address imbalances between your left and right sides.

2. Side lying leg lifts: Lie on your side with hips and legs stacked. Keeping your legs straight, exhale and lift your top leg about 6-8 inches with arching or rounding your back. Inhale and lower the leg with controlled speed.

3. Single leg squat: Standing on one leg, inhale and sit your hips down and back into a squat. Exhale and push through your heel to return to standing. This exercise is best done with visual feedback to ensure your knee does not move forward over your toes or fall inside or outside of the ankle. When starting single leg squats, it can be effective to use a bench or chair as an aid; squat down to the bench and then return to standing.

Looking to keep up to date with the latest blogs and news from Jalapeno Cycling? Be sure to subscribe to our newsletter to get our cycling tips delivered right to your mailbox. Also, if you are looking to prevent those aches and pains of constant sitting, be sure to sign up for our Strength Training, Off-The-Bike Classes, with more info to be found here.

2016 HPCX Masters Women's Race in Photos, Sponsored by Jalapeno Cycling

2016 HPCX Masters Women's Race in Photos, Sponsored by Jalapeno Cycling

We were pretty excited to be able to sponsor the first equal payout in Masters Women's cyclocross history this weekend. What got us more excited, though, was watching those athletes tear up the field on day one.

Erin Mascelli (Yukato Yoga p/b Sole Artisan Ales) and Robin Dunn (Cognition Coaching) combated for the holeshot, and both were able to get a very brief in the first few corners until the field rejoined at the staircase.

Joanne Abbruzzesi (Bike Line) was able to connect with the front group, and stuck on Mascelli's wheel for the first few laps as Dunn comfortably stayed in third.

MAC Series leader Jennifer Kraut (MidAtlantic Colavita Women's Team) led the chasing group, who included Lisa Most (Guy's Racing Club), Tara Parsons (CRCA/ Rapha Cycling Club), Lisa Vible (MidAtlantic Colavita Women's Team), and Tammy Ebersole (Evolution Racing). Kraut broke free of the rest on the riders, and started cutting into the time of the leaders as the race continued.

Abbruzzesi suffered a rough crash mid-way through the race on the off-camber before the barriers, allowing the duo of Dunn and Mascelli to lead off ahead.  Kraut was able to fight her way into third place, and within a few laps to go, she was in sight of the leaders.

By the end of the last lap, Mascelli was able to create a few second gap on Dunn to take the win, as Dunn came in for second and Kraut third.

We were able to capture plenty of great shots of the action in the race. You can scroll through them with the right and left arrows. Feel free to share or use any of these photos of these women who came out and really put in a killer effort!